
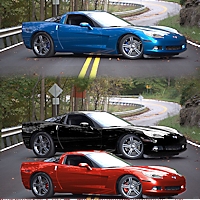
In this tutorial I will demonstrate how to change the color of a car and make it look realistic using Paint Shop Pro X5. These same techniques could be easily applied to virtually anything that you want to change the color of in PSP.
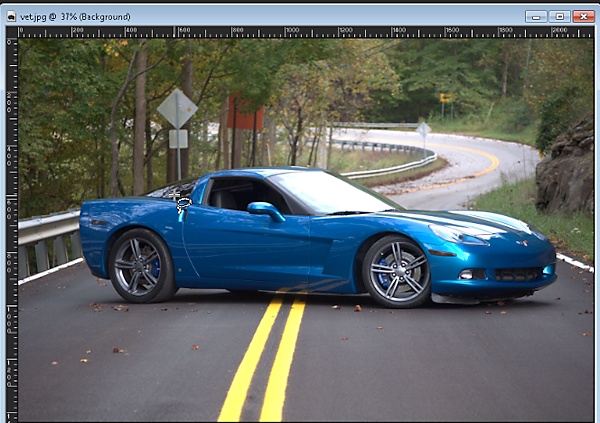
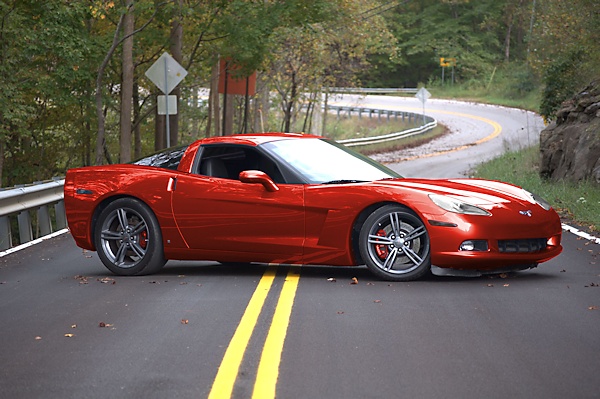
This is an easy to follow tutorial that should be compatible with practically all versions of PSP. For this demonstration, I am using a photo that my wife took of our neighbor’s/friend 968RWHP C6 2008 Corvette. For the car enthusiasts out there, here are videos of this Corvette on the dyno and another at the drag strip at Clay City, Kentucky. My neighbor took me for a ride in this jet once, never again. Also, I apologize in advance for some of the blurry screen captures. I forgot to do the screen caps from PSP while making the tutorial and had to used scaled down versions from the video.
HD Video Tutorial
Download the pspimage
Step 1
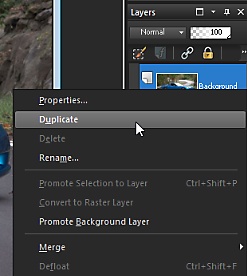
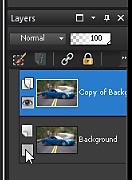
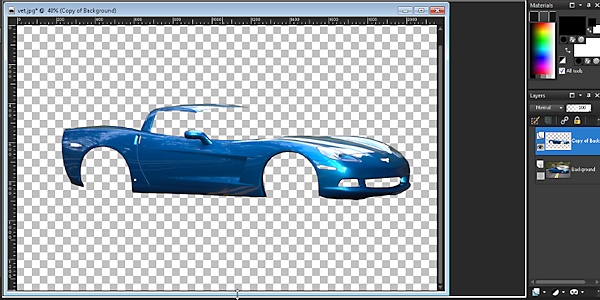
Open up the photo of the car you will be using and duplicate the background layer. Also, go ahead and toggle the visibility off for the background layer.
Step 2
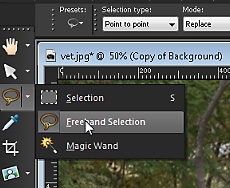
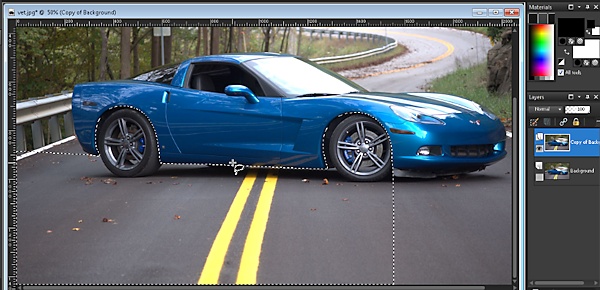
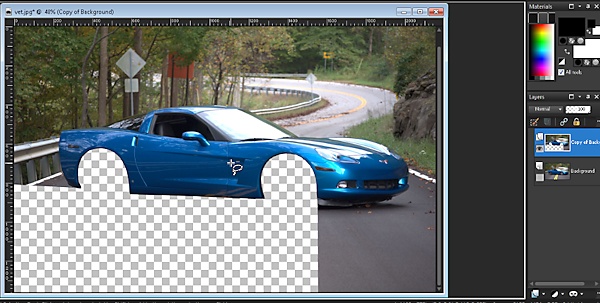
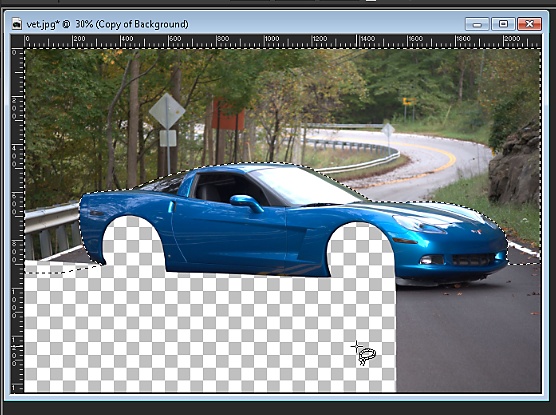
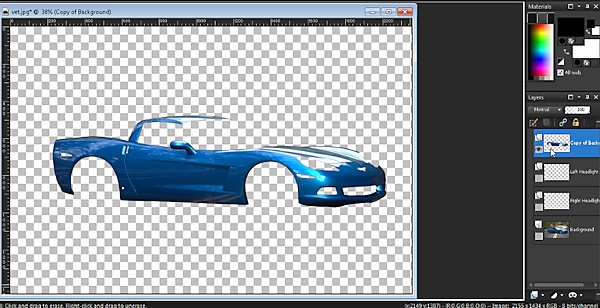
Using the “Copy of Background” layer, select the FreeHand Selection Tool and set the Selection Type to “Point to point.” Now we are going to start removing everything on and around the car except the body using several different selections. After you make a selection, press “Delete” on your keyboard to remove and then CTRL + D to deselect. Repeat this process until only the body of the car remains except for the headlights.
Step 3
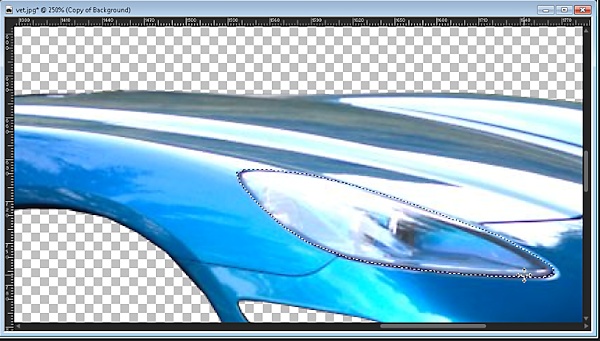
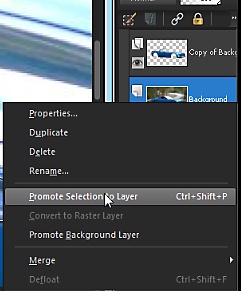
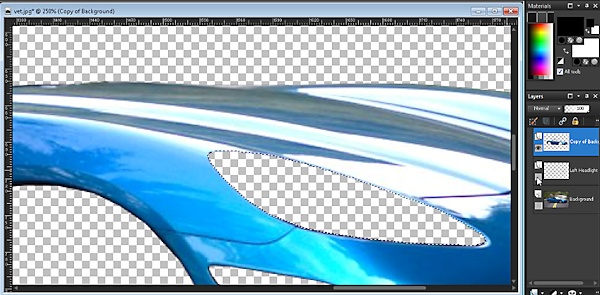
Next, make a selection around the left headlight. Once the selection is complete, right click the “Copy of Background” layer and select “Promote Selection to Layer.” Press ‘Delete’ to remove the headlight from the “Copy of Background” layer. Rename the new layer to “Left Headlight.” Next, Go to “Adjust > Hue/Saturation/Lightness” and lower the Saturation to -100 to remove any color bleeding/glare from the headlight. Repeat the process for the right head light. You will have two new layers, “Left Headlight” and “Right Headlight.”
Step 4(Optional)
Follow this step if you want matching or colored brake calipers. BTW, I made a typo in my layer naming convention
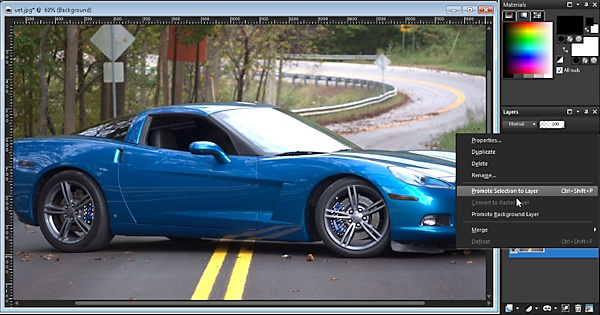
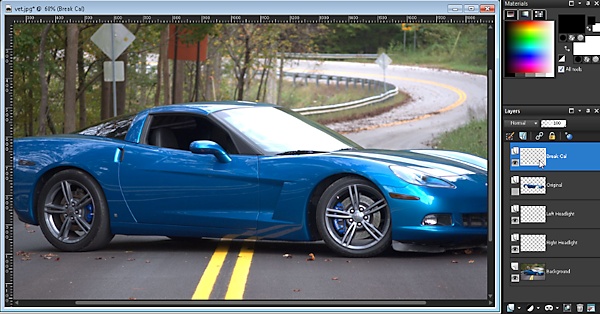
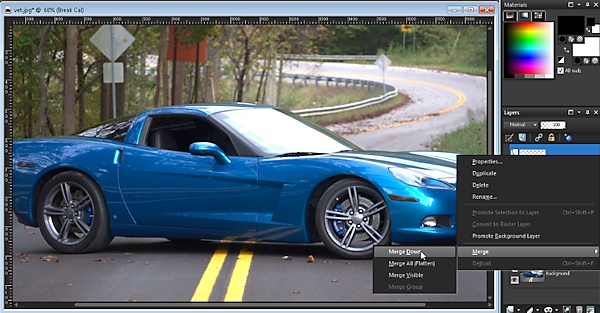
during the making of the video. I spelled the stopping “brake’ as the resting “break.” Anyway, select the “Background” layer and make selections around the front brake caliper. Hold Shift and make an additional selection around the rear brake caliper as well. Once the brake selections are complete, promote the selection to a layer. Rename the layer to “Brake Cal” or “Break Cal” and drag it above the “Copy of Background” layer. Finally, right click the “Brake Cal” layer and select “Merge > Merge Down.”
Step 5
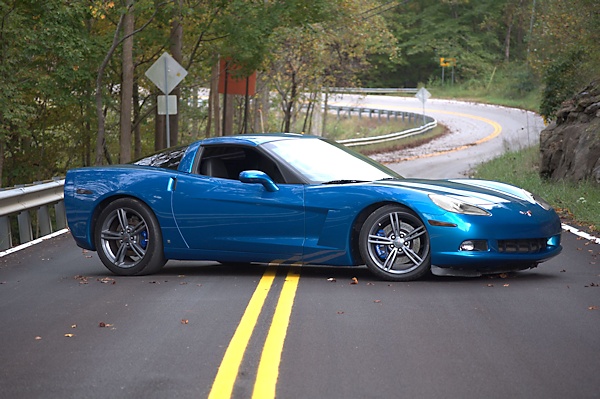
Rename the “Copy of Background” layer to “Original.” Right click to duplicate this layer 3 more times. Rename each layer “Color 1,” Color 2,” and “Color 3.” If you want to experiment with more than 3 colors then create as many “Color” layers as you need.
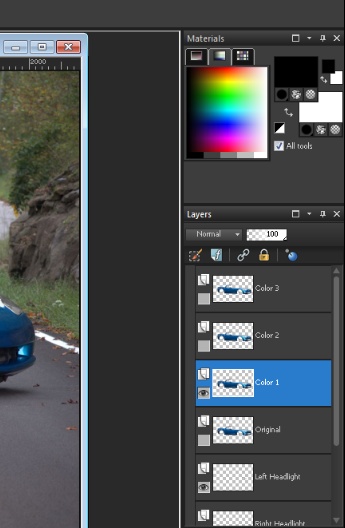
NOTE:
You can change colors using a variety of different tools in Paint Shop Pro. I will demonstrate 3 different tools/techniques in this tutorial. Feel free to experiment with different tools to achieve the results that you like.
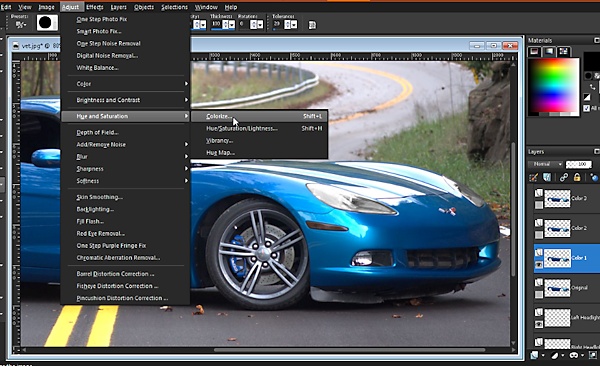
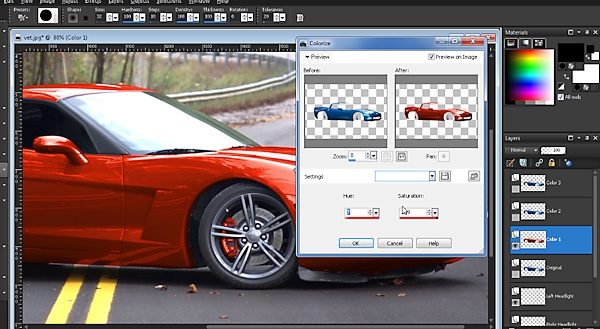
Step 6
Select the “Color 1” layer. Next, go to “Adjust > Hue and Saturation > Colorize.” Adjust the Hue and Saturation
to your desired color.
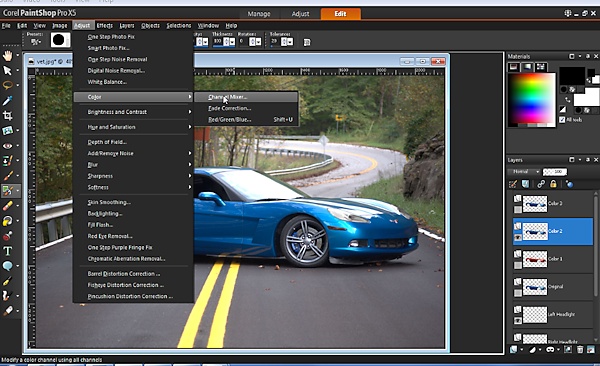
Step 7
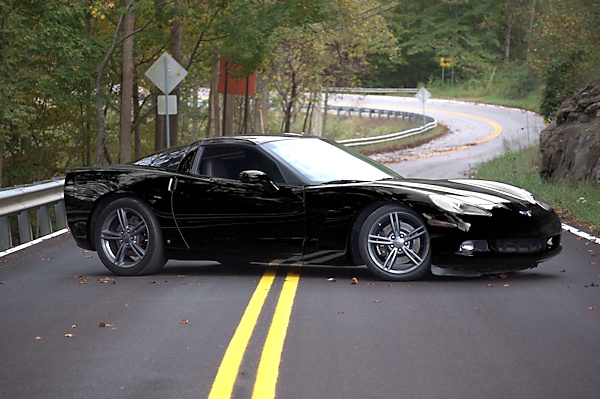
Select the “Color 2” layer. Next, go to “Adjust > Color > Channel Mixer.” Set the mixer to monochrome and the output channel to Grey if you want to use a darker color such as black.

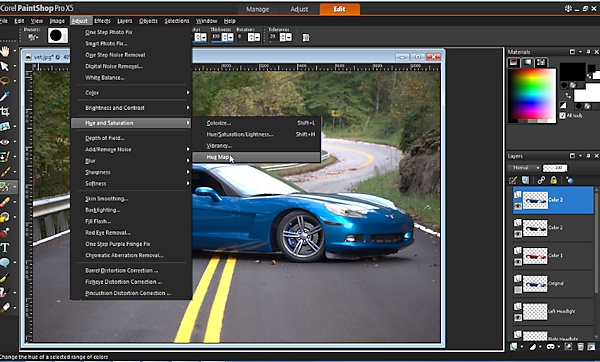
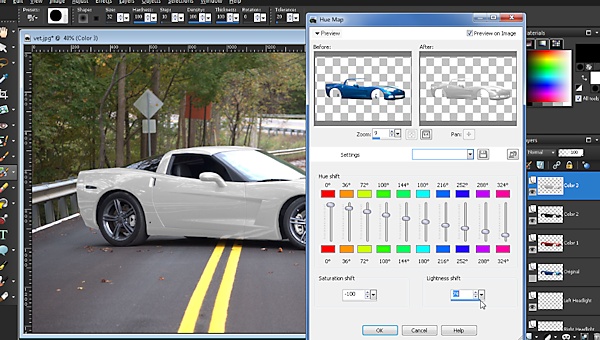
Step 8
Select the “Color 3” layer. Next, go to “Adjust > Hue and Saturation > Hue Map.” Lower the Saturation and increase
the lightness to achieve lighter colors such as light grey or white.
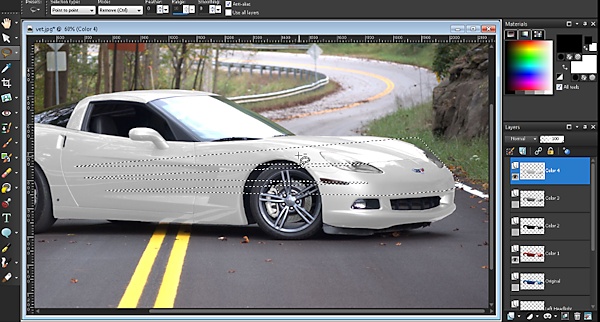
Step 9(Optional)
Create additional layers and experiment with different colors and effects. Use the selection tool to create graphics and/or put stripes on your car.
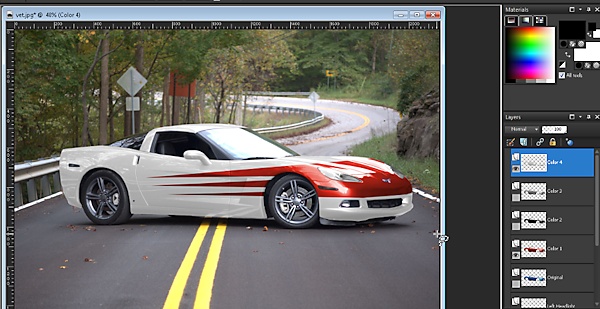
That’s it for this tutorial. Have fun and thanks for viewing!
Leave Your Response