

The context menu is the menu that comes up when you click a particular area, tool, or palette in Corel Paintshop Pro. I recently made the move from PSPX2 to PSPX4 and I noticed some of the context menu commands had changed. I had really came accustomed to the default context menu layout in X2 and really wanted the those same menus in X4.
After a few minutes combing through the settings I discovered that Corel Paintshop Pro X4 has a context menu customization that allows me to customize and arrange any and every context right click menu.
This discovery made me curious, so I opened up X2, and sure enough, menu customization has been there all along. I have been using this program for nearly a decade and never knew that this featured existed. To be fair, I never really looked either because I was happy with the right click menu commands present in all versions until Corel Paintshop Pro X4. The two commands that I used the most were “Create New Raster layer” and “Duplicate.” Both were missing from the X4 layers palette right click context menu.
I am not sure when this feature was integrated into the series? Out of curiosity, does anyone know? The oldest official documentation I could find was from this PSP8 user guide. This feature had been there since at least version 8. X2 is the oldest version that I still have installed. It’s kind of embarrassing that I have been using the program for this long and I am just now discovering this.
I have created custom toolbars in the past, but somehow overlook the customization of context menus. Anyway, I can now add any custom commands to any right click menu. Unsharpmask and plugins are definitely getting added. Awesome! This will definitely improve my workflow.
I thought I would share this tutorial for newcomers to Paintshop Pro, or for people like me that overlooked this feature. I can verify the following process is the same for X2, X3, and X4. Not sure about the previous version, but it is probably the same or very similar.
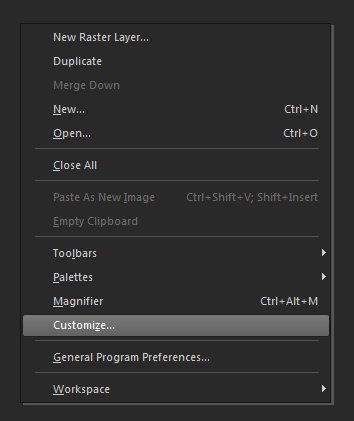
For this tutorial we will just edit the “Main” right click menu to demonstrate the process. You can use this process to edit any menu you like.
Step 1
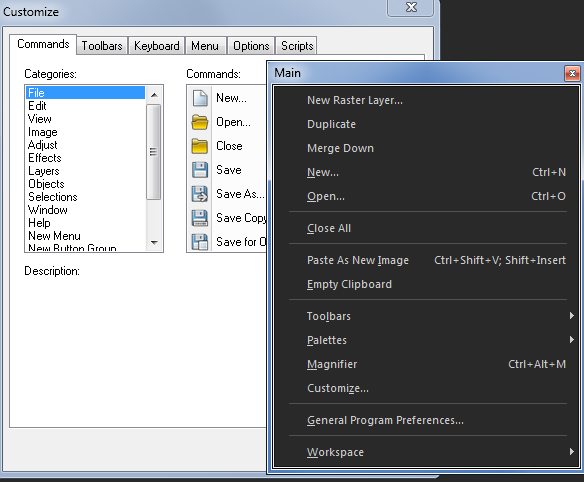
Right Click anywhere in the editing window and select ‘Customize’ to pull up the Customize window.
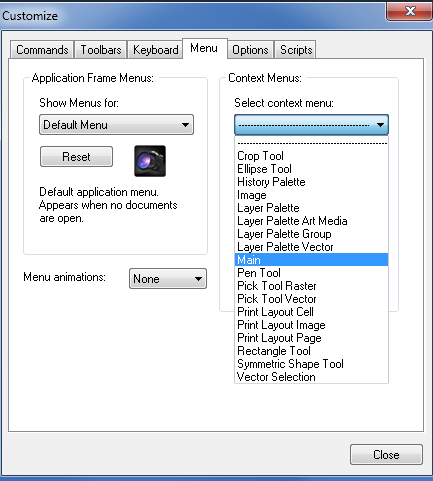
Step 2
Next, select the “Menu” Tab. Under the Menu Tab you will see “Context Menus” and a drop down list. That will pull up the “Main” Window that you see below. Note: If you need to Edit the Layer Palette right click context menu then select Layer Palette instead, or whatever other menu you wish to edit.

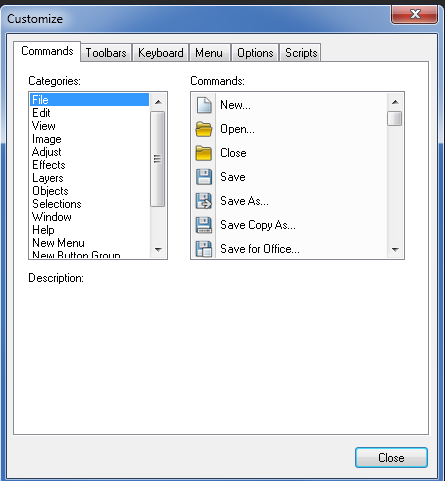
Step 3
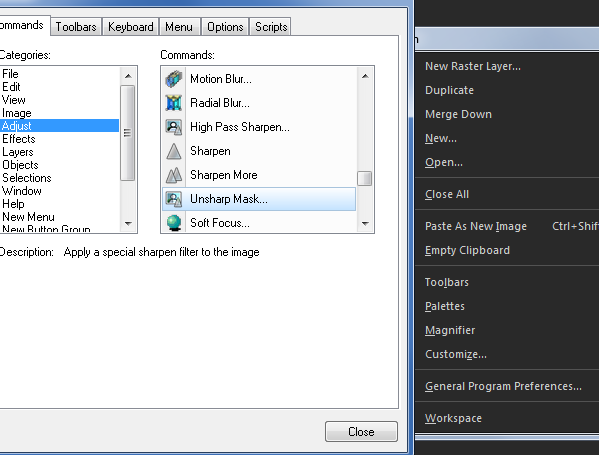
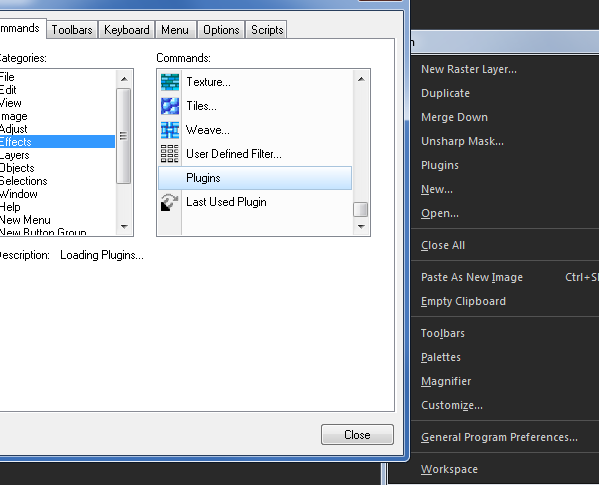
Now, click the “Command” Tab in the Customize Window. You will see Categories and Commands for each Category.
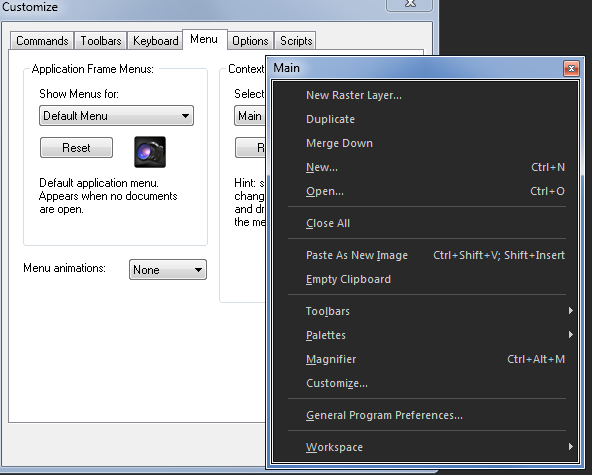
Step 4
Next, simply drag and drop any Command from any Category onto your Main Window. You can arrange them in any order you wish too. I am going to add Unsharpmask and Plugins to my Main context menu to
allow quicker access to these tools that I frequently use.
Step 5
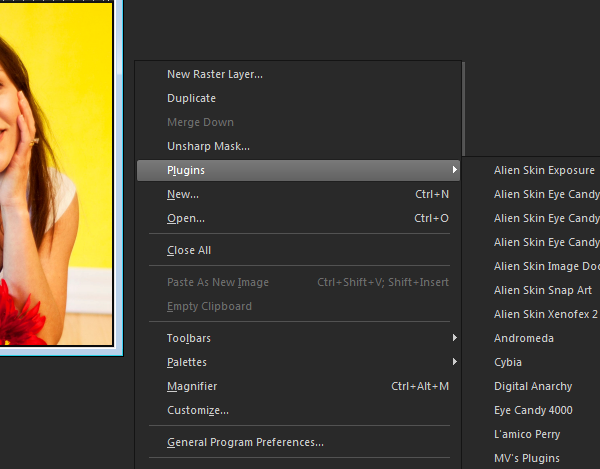
One you have the menu setup the way you want it just hit close. Right click to see your custom menu. Here is my Main, I also customized my Layer Palette right click menu too.
Leave Your Response