
This process is often referred to as photo to text, portrait to font, and/or photo to ASCII. I have seen similar effects created in Photoshop, but I haven’t seen a tutorial demonstrating the process in Corel Paintshop Pro.
I have tried replicating the procedures used in various “photo to text” Photoshop tutorials, but I have always been unsuccessful mainly due to the lack of word wrap in Corel Paintshop Pro.
However, I have a workaround that will allow us to create a similar effect using a free text to photo converter found online. The process that I used below is nowhere near the quality found on some Photoshop photo to text renders. The truth is, until we get a text tool tool that supports word wrap it would be difficult to clone the procedure.
I do have a few ideas that I could possibly use to expand upon this tutorial on a later date. I will have to test them some before implementing. But, I am thinking that I could potentially pull off results somewhat similar to those found in Photoshop tutorials by using a HTML or Word program that supports word wrap. This would allow me to use custom text too, and then import into Paintshop Pro using a screen capture. Most of the photo to text converters that I have tried online just randomly generate characters.
I think there are a few plugins and standalone software, such as, Textazier Pro that generate images using custom text that you provide. I haven’t tried any of the plugins or software yet because I really prefer creating and replicating effects using just the Paintshop Pro toolset.
Anyway, here is a method that you can use to quickly create a custom text portrait brush from any image. Definitely not perfect, but fun to do nonetheless.
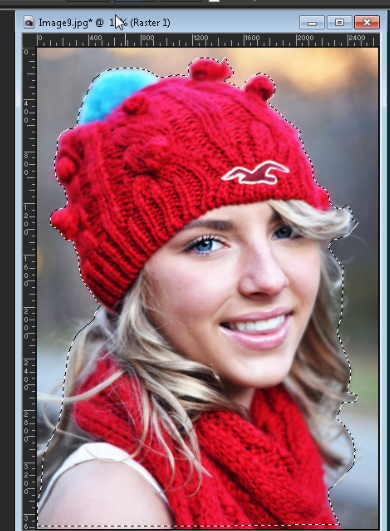
Step 1
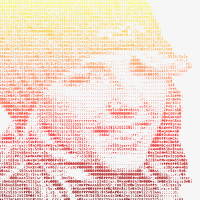
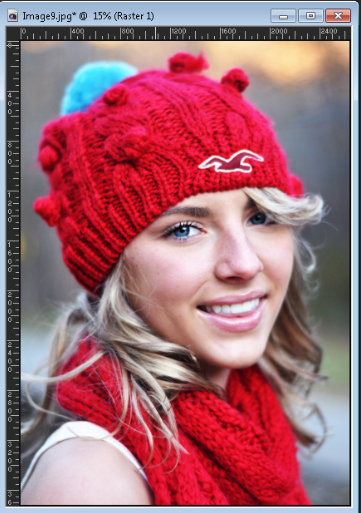
Open the photo that you want to convert to text. I used a photo of my wife’s beautiful cousin Hannah.
Step 2
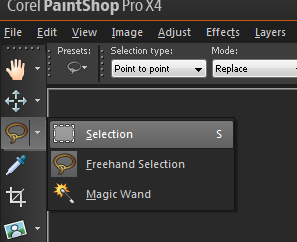
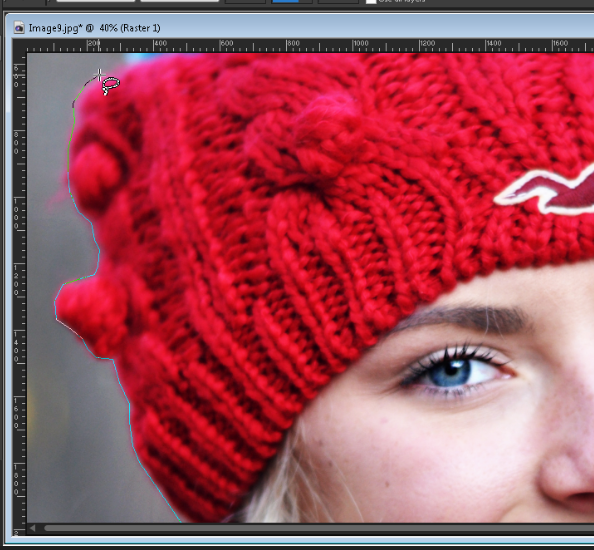
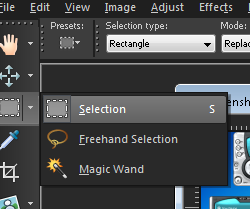
Select the Freehand Selection tool and set the selection type to point to point. Next, draw a selection around the person so that we can remove the background. Note: The selections do not have to be exact, especially around the hair.
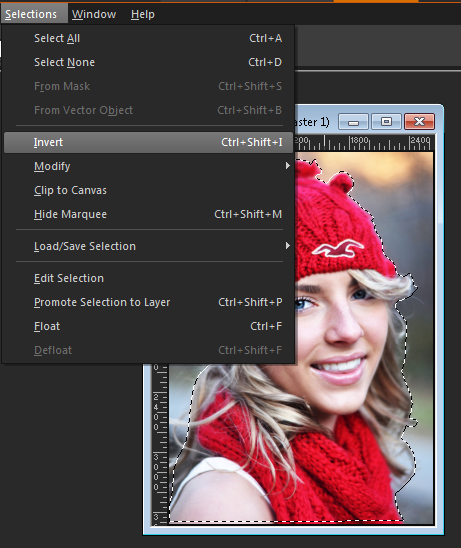
Step 3
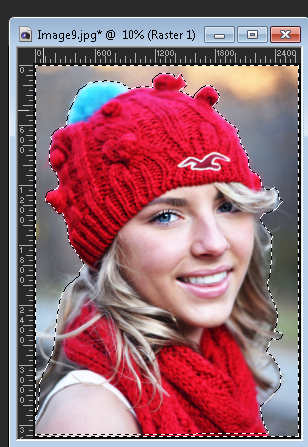
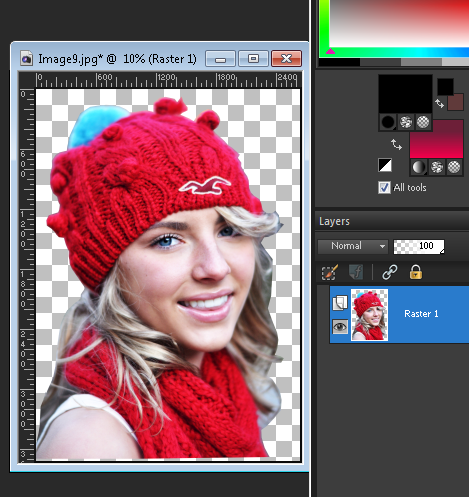
Once your selection is complete go to Selections > Invert to invert the selection. Next press ‘Delete’ on your keyboard to remove the inverted selection. Finally, press Ctrl + D to deselect.
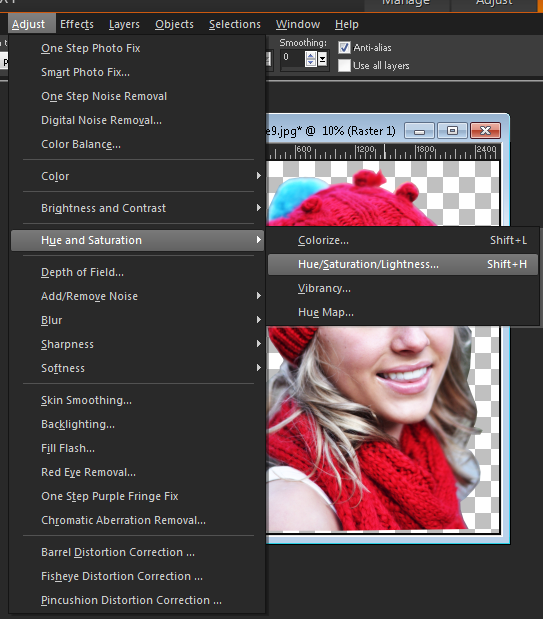
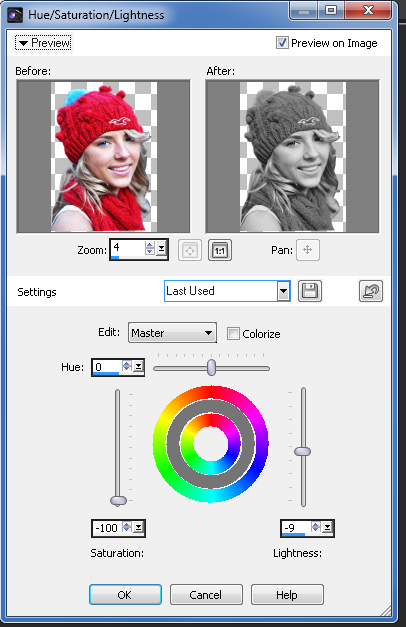
Step 4
Now go to Adjust > Hue and Saturation > Hue/Saturation/Lightness. Lower the saturation to -100 and the Lightness to around -10.
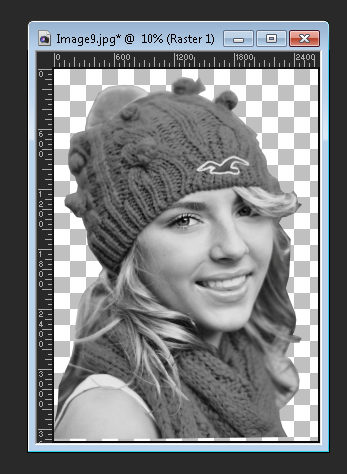
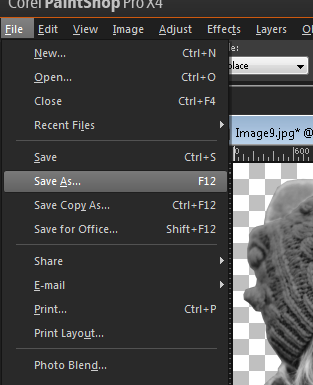
Step 5
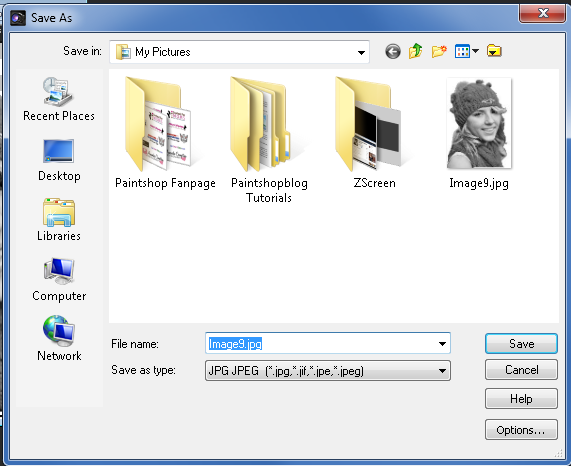
Save the image as a jpg. File > Save As (or press F12 on your keyboard).
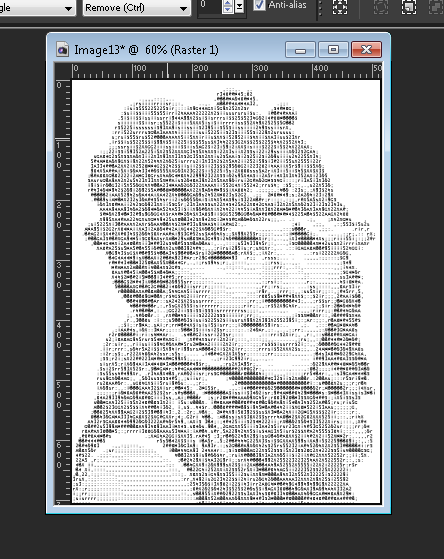
Step 6
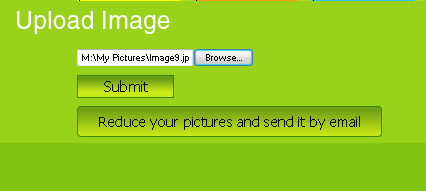
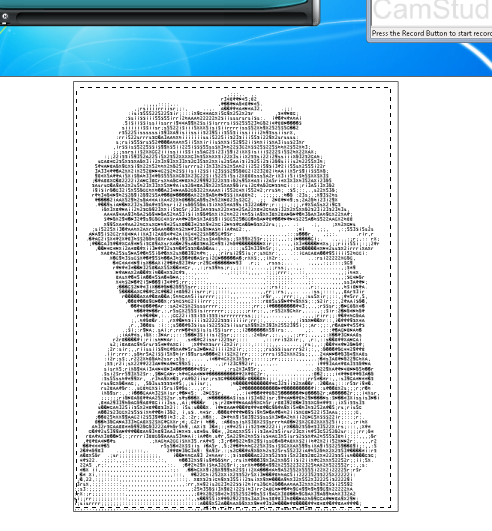
Next, minimize Paintshop pro and open up your web browser. Go to www.photo2text.com and upload your photo and then hit submit. Wait a few seconds for your image to convert to text.
Step 7
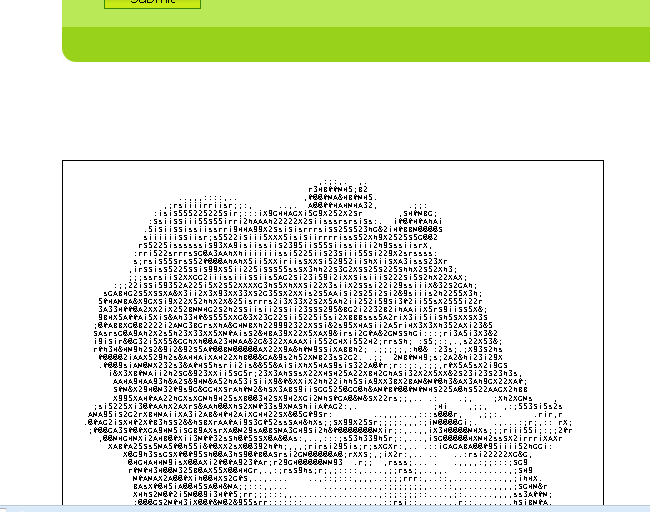
Once the image is converted hit the ‘Print Screen’ key on your keyboard. Note: If you can’t see the whole image in your browser, then try pressing ‘F11’ to go to full screen mode and then press ‘Print Screen’ again.
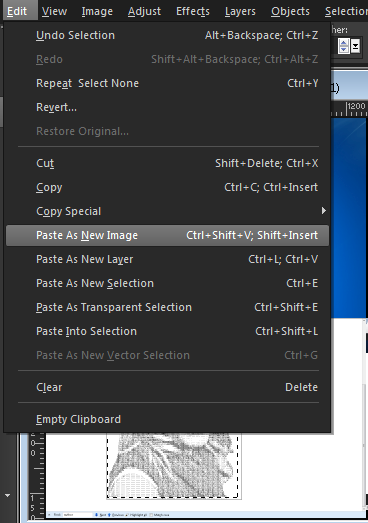
Step 8
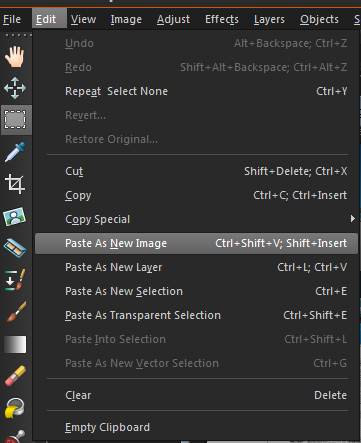
Now, pull Paintshop Pro back up and go to Edit > Paste as New Image. This will paste a screen capture of your entire desktop. Use the Rectangle Selection tool to select the portion of the screen captured photo2text image.
Step 9
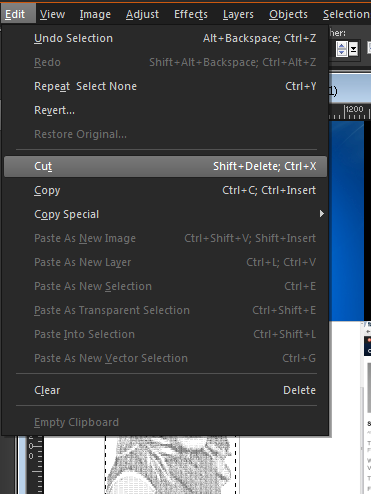
Next, go to Edit > Cut, then Edit > Paste as a New Image and you will be left with your text image.
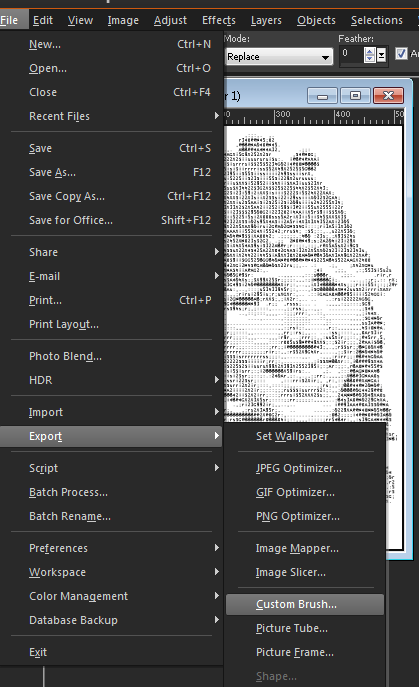
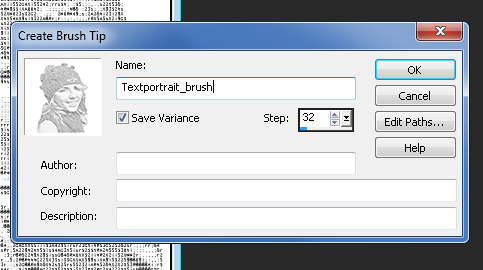
Step 10
Now we are ready to export to a custom brush to use in future projects. Go to File > Export > Custom Brush. Name the brush and click ‘Ok’
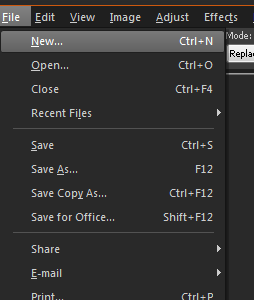
Step 11
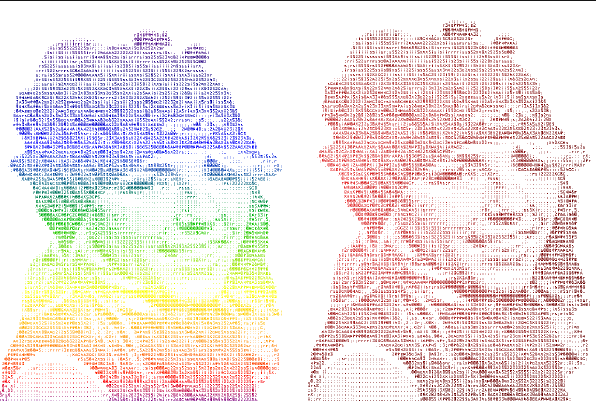
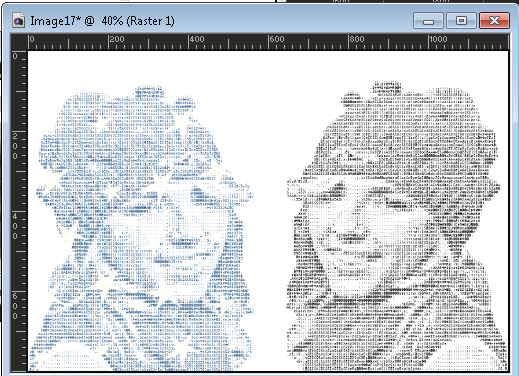
Let’s test out our new text portrait brush. Create a New 1200 x 800 image with a white background to test your new brush. File > New.

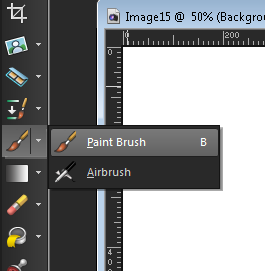
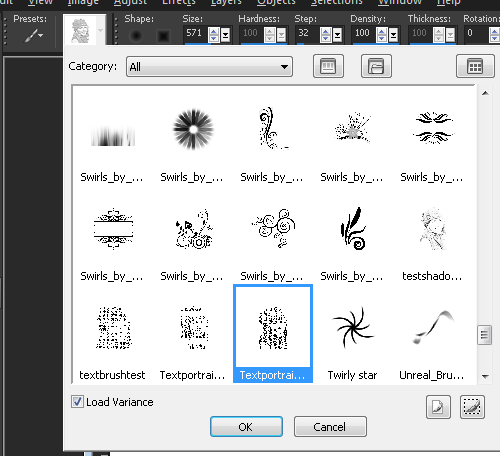
Step 12
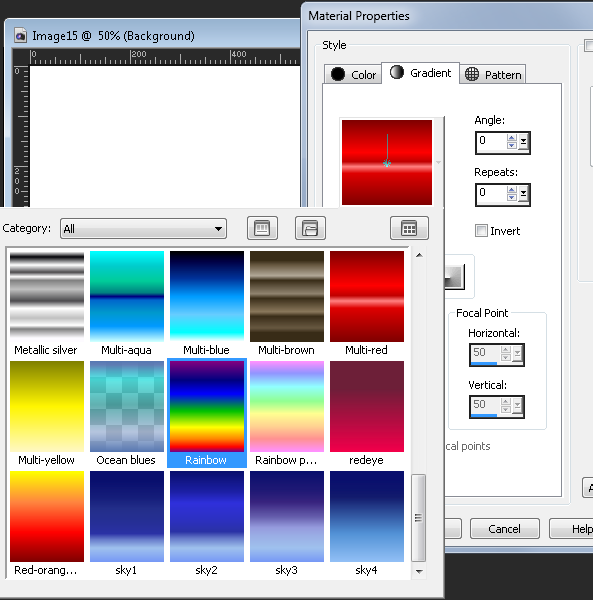
Now go to Brushes and select your new brush tip. Note: The brushes will be in alphabetical order.
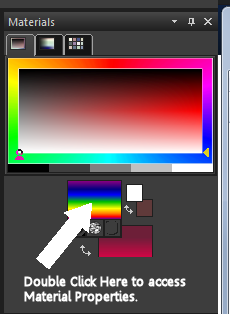
Step 13
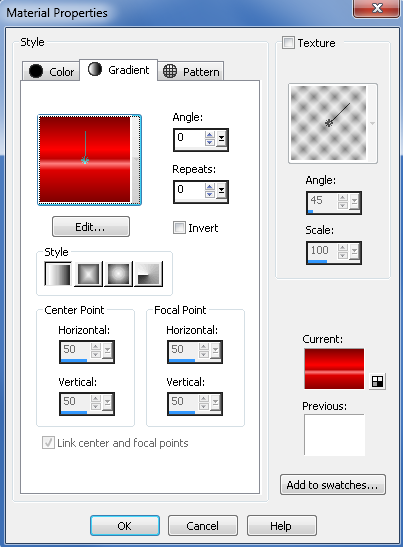
Apply any color, gradient, or pattern from the material properties to give your text image brush a little life.
Step 14
Test your new brush different colors and gradients.

2 Responses
this sure is a great and useful post. thanks!
I didn’t get why you were mentioning the lack of a word wrap feature in PSP! Now I see one of the reason it should have it!
It funny because lately I’ve been seeing these text portrait pictures a lot!
I haven’t tried this but I will soon!
Thanks!
PS – Have you gotten X5 yet? I love it!