
Creating brushes in PSP is really simple. To create custom brushes there are basically three things you need to do when you are preparing to export an image to a brush.
First, you need to find or create an image with a transparent (usually a png or gif) background, or an image with a white background. Photos with black grounds will work fine too. You can use stock photography or import you own custom photos.
Second, you need to make sure the image is no bigger than 999 pixels wide or 999 pixels high. For example: 500 x 999, 999 x 500, or 999 x 999 are all proper sizes supported by Corel Paintshop Pro. 1200 x 999, 999 x 1200, 1000 x 1000 are all unsupported sizes.
Third and finally, you need to make sure you convert the image to greyscale before exporting to a Custom Brush in Paint Shop Pro.
This tutorial contains two parts below. In the first section of the tutorial we will cover converting an image that has an even aspect ratio and a white and/or transparent background. In Part 2 we will cover converting images that have black backgrounds and uneven aspect ratios.
Step 1
(Part 1)
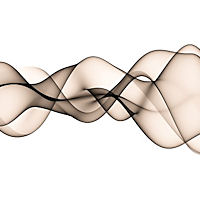
First download and open this swirly image (or any image that you want to convert to a brush in Paintshop Pro). Note: This image has a white background and the same steps in this section would also be applied to an image that has a transparent background or an image that you want to manually remove the background from.
.jpg)
Step 2
(Part 1)
Once the image is open, the first thing you want to do is check its size. To do this, go to Image > Image Information or press (Shift + I) on you keyboard. As we can see this image exceeds 999 pixels on both height and width. If your image doesn’t exceed 999 pixels on height or width you can skip step 3.
.jpg)
Step 3
(Part 1)
To resize the image go to Image > Resize or press (Shift + S) on your keyboard to pull up the Resize tool. Make sure “Lock aspect Ratio” is checked before resizing to prevent the aspect ratio from becoming distorted or stretched. Note: Always try to find images larger than 999 pixels and then scale them down to 999 pixels. It’s always better to scale the size of a photo down rather than scaling up. Scaling up a small photo to 999 pixels will mostly likely create pixelation and distortion, which will result in poorer quality brushes.
.jpg)
.jpg)
Step 4
(Part 1)
Next, go to Image > Greyscale to convert the image to Greyscale.
.png)
.png)
Step 5
(Part 1)
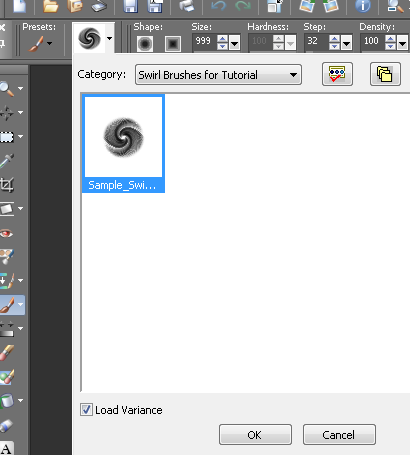
We are now ready to export our image to a custom brush. Go to File > Export > Custom Brush to create the custom brush tip for Paintshop Pro. Give your new brush a name that will help you identify it in the future. Leave the step around 32 and check “save variance” then press ‘OK’. Your custom brush tip should now be available in your brush palette. Note: If you don’t see it, try restarting Paintshop Pro.
.png)
.png)
Step 6
(Part 1)
Now lets test our new brush. Create a new image around 1200 x 1200 pixels with a black background. File > New Image. Next, select the Brush Tool (Press ‘B’ on your keyboard) and select your new brush tip. Next, lets apply a colorful sunburst rainbow gradient to make it really pop off the black background (Double Click the Material Properties and select Gradient tab). I resized the brush tip to 300 and added a couple more brush strokes with different gradients and colors. Note: You can paint brush strokes with colors, gradients, or patterns.
.png)
.png)
.png)
.png)
Step 7 (Optional)
(Part 1)
When I create brushes, I like to organize them in their own folders into categories in Paintshop Pro. To do this you need to open PSP’s default brush path. The Brush tips are always exported to your Default Brush Path Directory. The default path is usually My Documents > My PSP Files > Brushes. If you don’t see your custom brush tips after exporting, then check File > Preferences > File Locations > Brushes to find the default path to your brush directory.
.png)
.jpg)
Step 8 (Optional)
(Part 1)
Inside your Default Brush Path create a New Folder and rename it to something to help you easily identify your brushes in the future (these will also become a new Category in the Brush Palette). I renamed my New Folder to “Swirl Brushes For Tutorial.” Next, Edit > Cut the PspBrush and PspScript for the exported custom brush that you created earlier. Next, open your newly created folder and paste the PspBrush and PspScript. Finally, you will need restart Paintshop Pro to see you brushes in their own category. Note: Repeat this process if you want to create an entire set under one category.
.jpg)
.jpg)
.jpg)
Step 1
(Part 2)
For this part of the tutorial I used this image. It has a black background and an uneven aspect ratio.
.jpg)
Step 2
(Part 2)
Just like in Step 2 of the (part 1) check the size of the image (Image > Image Information or Shift + I). As we can see it is larger than 999 pixels on both width and height and has an uneven aspect ratio. You can again skip Step 3 if your image doesn’t exceed 999 pixels on either width or height.
.jpg)
Step 3
(Part 2)
Go to Image > Resize or (SHIFT + S) to pull up the resize tool. Make sure “Lock Aspect Ratio” is checked and resize the largest pixel dimension to 999 pixels. The small dimension will automatically resize itself in order to maintain the correct aspect ratio. Now we can verify that our image resized correctly by pressing (Shift + I).
.jpg)
.jpg)
.jpg)
.jpg)
Step 4
(Part 2)
We need to convert this image to a white background. To do this select Image > Negative Image. As I mentioned earlier, in order for the masking to work properly, custom brushes need to have white or transparent backgrounds.
.jpg)
.jpg)
Step 5
(Part 2)
Next we need to convert the negative image to greyscale. To do this select Image > Greyscale. Note: The darker black colors create brighter brush strokes without any transparency. The lighter grey colors are less bright and allow for some background transparency. The lighter the grey the more transparency that part of the brush tip will have.
.jpg)
.jpg)
Step 6
(Part 2)
We are ready to export to a custom brush now that we have the image resized correctly, the background is white, and the image is greyscaled. To export to a Custom Brush, go to File > Export > Custom Brush. Set the step to around 32 and give the brush a unique name so that you can easily find it later.
.jpg)
.jpg)
Step 7
(Part 2)
Lets test out our newly created brush. Create a new image with black or any background color of your choice. Select a rainbow sunburst gradient or another gradient/color/pattern of your choice. Note: Remember you can always scale your brushes down if they are too big for the image you’ re working with.
.jpg)
.jpg)
.jpg)
.jpg)
.jpg)
That’s it!
Have fun experimenting and adding all kinds of new free Paintshop Pro custom brushes to your collection!
6 Responses
Thanks, thanks, thanks ! I just discover your blog. It’s fantastic ! I enjoy that you share with us you knowledges about PSP.
Thank you chamours
thank u very much. greetings .
THank you for covering Paint Shop Pro in your blog. So many people love the program and you are actually teaching them how to create in their own.
Thanks!
Thank You!