
In this tutorial you will learn how to quickly change the color of any object in your photo using only the Hue/Saturation/Lightness (HSL) tool.
This process is much more effective and cleaner than using the color replace tool. In my experience, the color replacer tool doesn’t always produce a clean color change. More often than not you will not get a realistic effect with just the color replace tool. In my opinion, you can achieve a more realistic color change effect with the HSL tool. HSL tool gives you more control when changing colors than the color replacer tool. For a more effective, and more advanced technique you can refer to this previous video tutorial; http://www.torqque.com/2008/02/04/video-tutorial-how-to-change-color-of-a-car-in-paint-shop-pro/
However, in this HSL technique that you will learn about in this tutorial, should be more than efficient for all your basic photo editing needs. For example, you can easily change the color of cars, shirts, hats, toys, other clothes, sky, flowers, backgrounds, landscapes, or about any thing else in your photo. Browse to the bottom of this tutorial to see other examples of color changes in photos. This quick tutorial consists of 5 easy steps. Let’s go ahead and get started!
Video Example
Reserved for youtube video when posted.
Step 1
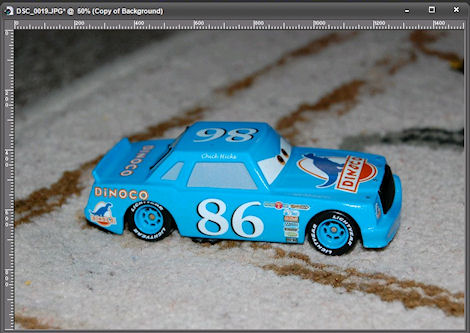
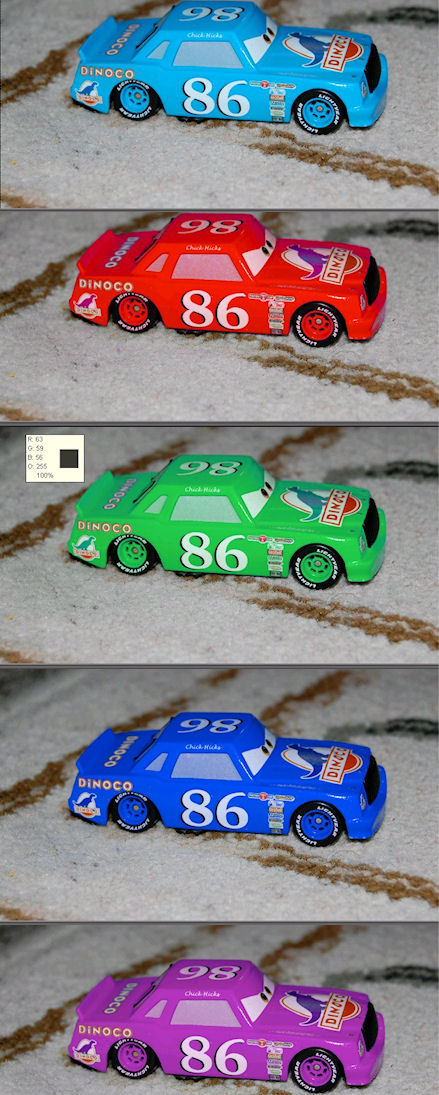
Open the photo that contains the object that you want to change colors. For this tutorial I used a photo of one of my son’s Disney Cars.
Step 2
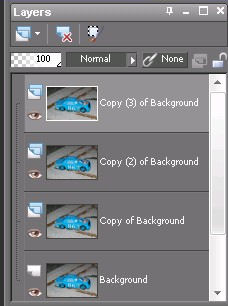
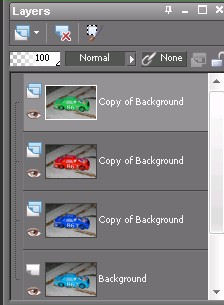
Right Click the background layer and create several Duplicates. See photo below for example. Note: This process will allow you to experiment will different colors without messing with the original copy.
 >
>Step 3
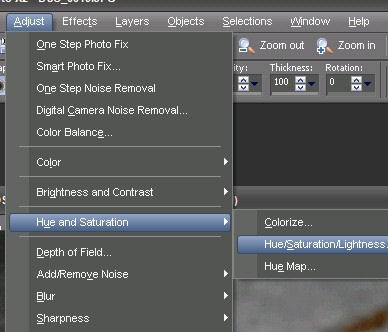
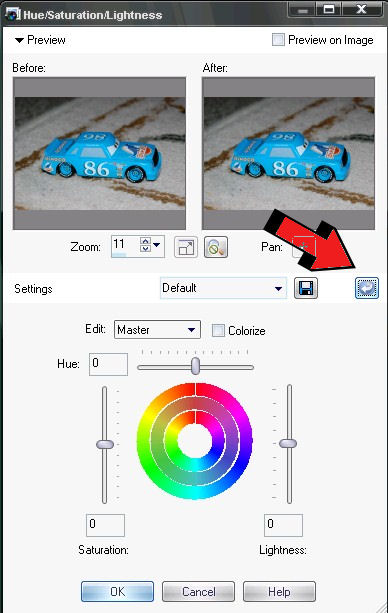
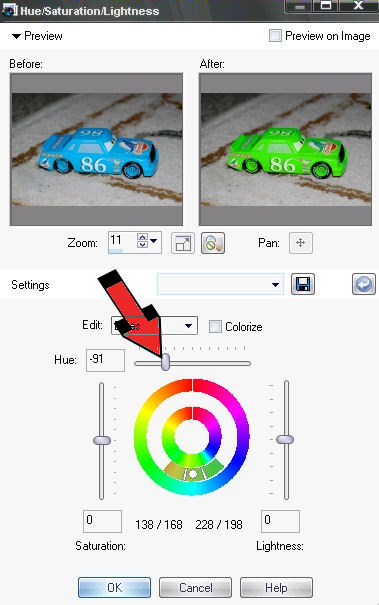
Select one of the duplicated layers and then go to Adjust > Hue and Saturation > Hue/Saturation/Lightness (HSL). Now with the HSL tool pulled go ahead and click the default settings reset button to clear any previous settings that may have been used. Note: Each time you need to make a new adjustment in the HSL tool you should reset the HSL tool (or any other tool for that matter) to the default settings. This is because PSP remembers your last used settings. The red arrow in the photo below is pointing at the default reset button.
Step 4
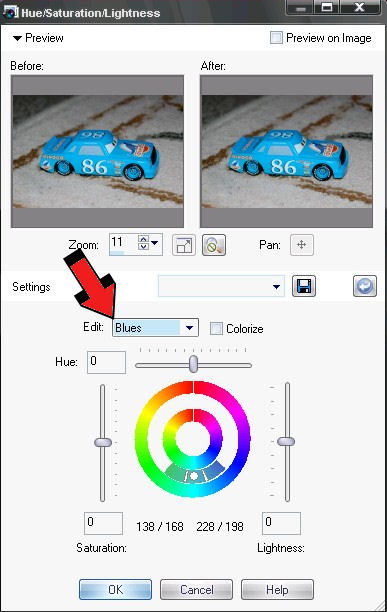
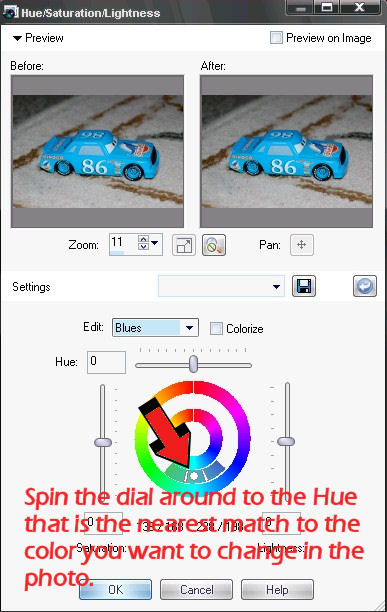
Next, select the color in the edit menu to the color of the object that you want to change the color of. For example, Dinoco Chick Hicks is blue so I selected ‘Blues’ because I want to edit only the blue Hues in my photo. If you have an object in your photo that is red then you would select reds. If it was yellow, you would select yellows, and so on. Next, spin the Color Dial so that the center circle on the dial aligns with the color that is the nearest match to the color you are changing. See photo below for an example, and notice how my dial is aligned with the color that is most similar to the Blue color of Chick Hicks.
Step 5
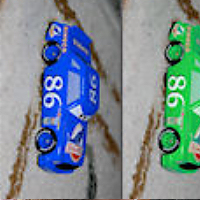
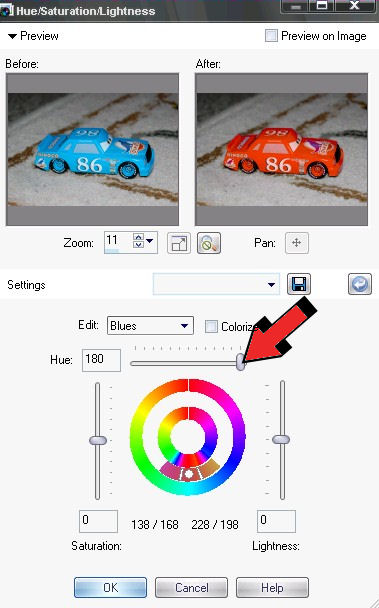
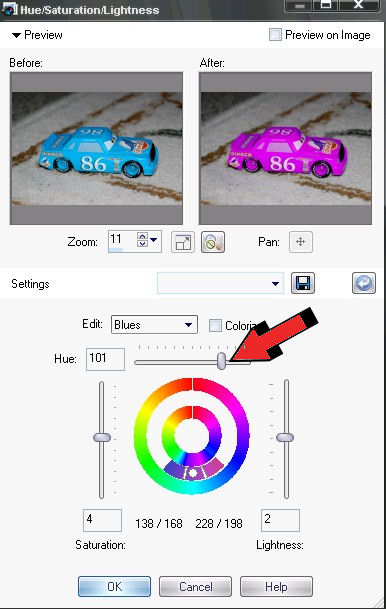
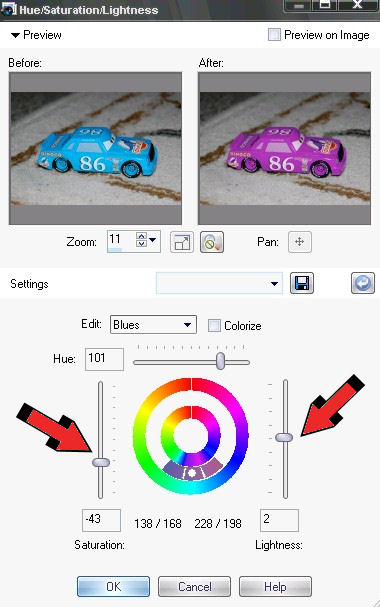
Now, begin adjusting the Hue slider to the right or left until you get the color you desire. See photos below for example. Note: You can also adjust the Saturation and Brightness of a particular color by sliding each of their sliders.
Step 6
The final results! Hint: if you have a photo that has several Hues that are similar, and parts of the photo change color that you didn’t want, simply use your eraser tool to brush away those areas.
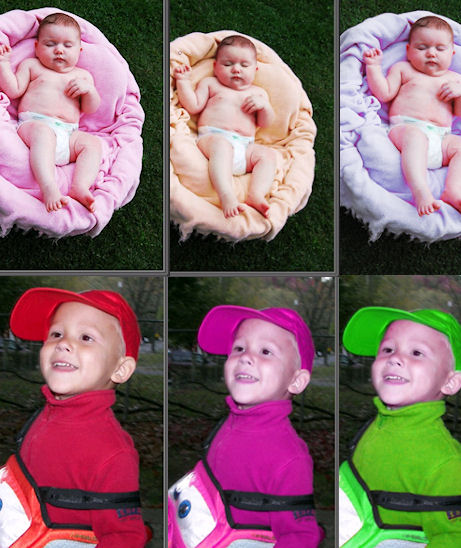
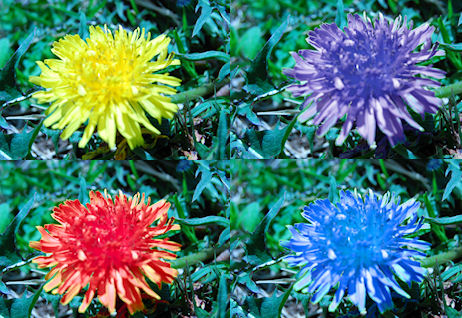
Examples
Just a demonstration of changing colors of different photo objects.
11 Responses
WOOOOW This is great , thanks for this tutorial.You are the best designer I ever Saw.
Amazing tutorial…simple and yet very effective…thanks once again for sharing….
This is pretty good, but i tried to change the color of my silver car and it doesn’t work, is this only for darker colors? thanks;)
that great i dont use much that tool but now i may have a reason to use it
This site is fantastic!! Thanks so much for posting such easy tutorials and ideas!! Like gold 🙂
thx sooo much it really worked 😀
Thank you, this is the best tutorial for beginners I ever saw.
Thank you so much for this! This was very simple to do . Youre awesome!
Thank you very much for sharing your wonderful tutorials!
Just upgraded to 9 from 7 i miss the colour replace tool what about black and just a selection of black for Eg i am cleaning a flyer want the black back to black so i used colour replace tool this was an excellent tool the reason I never completely changed over to cs10, Now its gone. Don’t get me wrong fantastic tool if you want to change a colour of an object that’s not its self surrounded in depth with colour other wise the background also changes which is awful. I just want to be able to replace faded black with black faded yellow with yellow were needed now how do I do that???
could you tell me a simple way to change a black object to a light color?