

This tutorial will teach you how to quickly change eye color in Corel Paintshop Pro. This tutorial should be compatible with all versions of Paintshop Pro and will only take a couple minutes to complete. For this demonstration, I used a beautiful photo of wife that my youngest son took of her this summer.
I created a Youtube video several years ago that I shared on here on how to change eye color but the video quality was really poor. And as I mentioned in a previous post, I am replacing all the old Paintshop Pro videos on here and in my youtube channel with new HD tutorials.
I hope you enjoy and find this tutorial useful.
How to change eye color in Paintshop Pro video
Step 1
Open up the photo that you want to change the eye color in.
.jpg)
Step 2
Select the Freehand Selection tool and set the mode to Point to Point.
.jpg)
Step 3
Zoom in and outline the left eye. With the selection still active, press and hold Shift while you outline the right eye. Note: Holding shift allows you to add additional selections.
.jpg)
.jpg)
.jpg)
Step 4
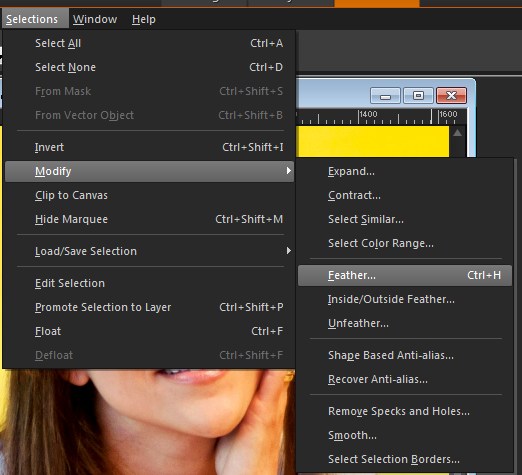
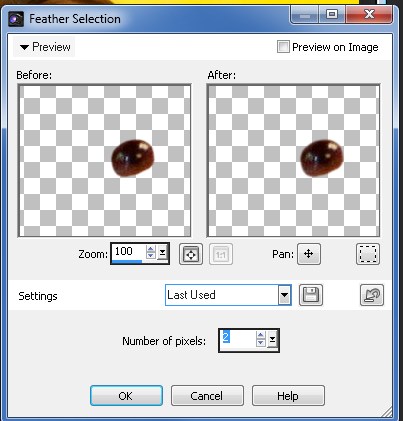
Now that both eyes are selected, go to Selection > Modify > Feather (or press CTRL+H), and Feather the number of pixels to around 2 or 3.
Step 5
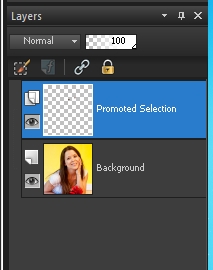
Next, right click on the background layer and select Promote Selection to a Layer.
.jpg)
Step 6
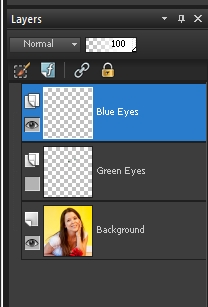
Right click and Duplicate the ‘Promoted Selection’ layer. I renamed one layer to ‘Blue Eyes’ and the other to ‘Green Eyes’ or just rename your layers to match the colors that you want to use.
(Optional Step)
This step is optional and not necessary, but it will allow you to easily reload the eye selections that you already made if you decide that you want to later reedit or add more eye colors. With the selection still active, go to Selections > Load/Save Selections > Save Selections to Alpha Channel. Rename the selection so you can easily identify your selections when you need them. Just repeat the process except select Load Selection from Alpha Channel when you are ready to use it again. Note: I recommend getting in the habit of saving your selections to the Alpha Channel or even to the disk. This will make your future projects flow smoothly especially when you need to make adjustments.
.jpg)
.jpg)
Step 7
With the selection still active, select the ‘Blue Eyes’ layer and then go to Adjust > Hue & Saturation > Colorize (or press Shift+L) to access the colorize tool. Set the Hue and Saturation to blue or the color of your choice. Repeat the process for the ‘Green Eyes’ layer.
.jpg)
.jpg)
.jpg)
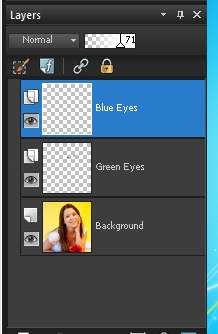
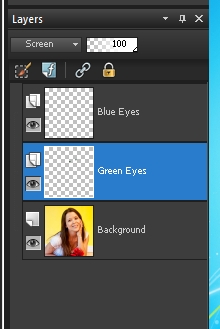
Step 8
Next, lower the opacity of the ‘Blue Eyes’ layer. I set mine at 71. Set your opacity to whatever looks best to you. Note: For the ‘Green Eyes’ layer I left the opacity at 100% and just changed the blend mode to Screen. Finally, press CTRL+D to deselect.
.jpg)
.png)
One Response
Fantastic! The video was very easy to follow. Thank you!