

In this tutorial we are going to learn how to make a homemade Christmas card using Corel Paint Shop Pro. As an added bonus, I have created an in-depth Christmas holiday makeover tutorial.
If you are not interested in making the Christmas Card, but still want to learn how to do a makeover in Paint Shop pro, then I suggest you check out the makeover section of this tutorial. I cover some very useful makeover effects in great detail. This is a lengthy but fun tutorial. Actually, I had a great time putting this together, even though it took me about 6 hours. Lots and lots of photos to crop, and many details to cover. Anyway, there are several techniques you may find useful, especially if you are new to Paint Shop Pro.
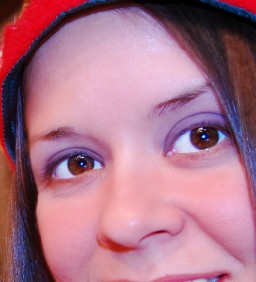
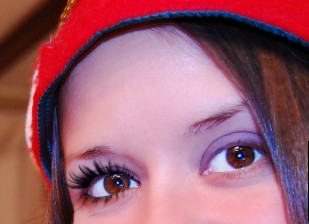
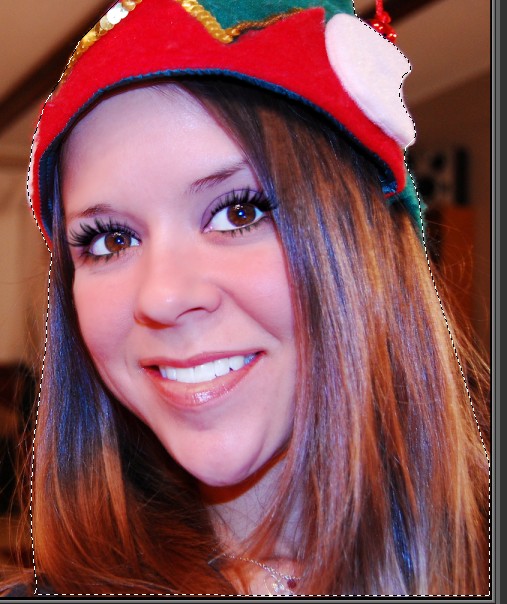
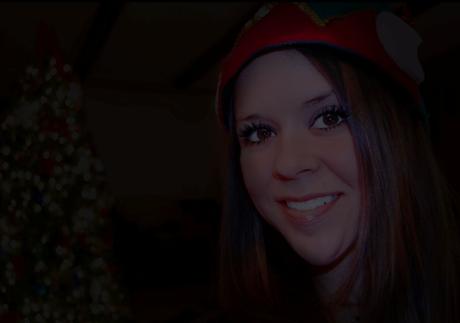
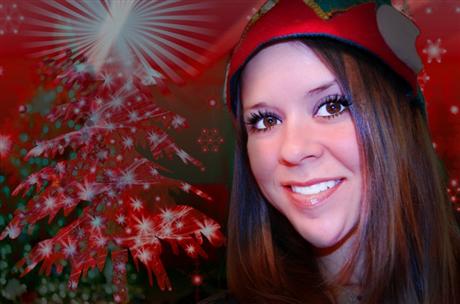
For this tutorial I used a lovely photo of my wife in her Christmas hat. Yes, she is beautiful without the makeover, however, there’s nothing like a little digital makeup to further enhance her already amazingly beautiful face. (Trying to get a few of my brownie points in). And no, that’s not a hint that you need start wearing makeup more often.
Oh BTW, if you would like to read more about wife and our family, you can visit her blog over at her Contests & Sweepstakes website. Just in case someone is interested, she is always having contests for prizes, and she has several Christmas Gift contests going on through the Holiday Season. It’s not a scam or spam site either (I help her choose many of the winners myself). She and her sponsors give away a variety of different products ranging from multiple 500 dollar gift cards, Nintendo Wii’s and/or Wii accessories/games, clothes, dvd’s, books, tons of toys, etc.
Well enough rambling, lets get started. Oh wait, one more thing, I want to wish everyone a Merry Christmas and Happy New Year. I hope you enjoy the tutorial, and thanks for stopping by. I look forward to your comments.
Youtube Video
You are also welcome to use the video for reference.
Step 1
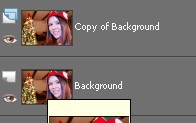
Open the photo of yourself or someone that you would like to use. Or you are welcome to use the same photo of my wife that I used. Duplicate the original picture.
Step 2
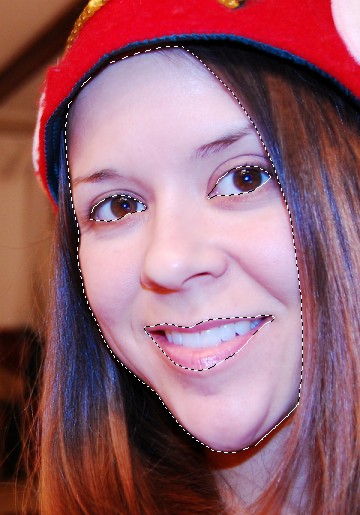
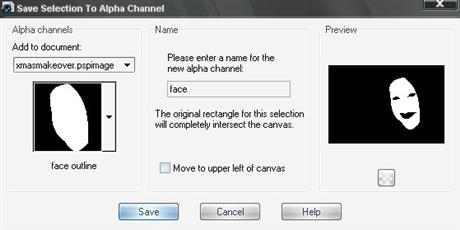
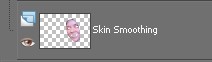
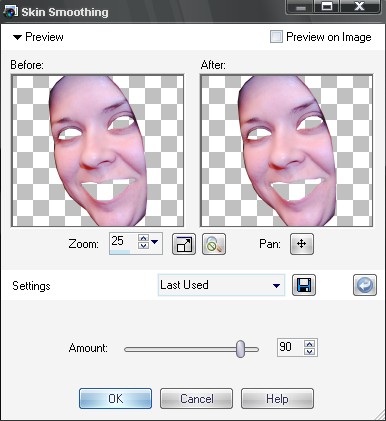
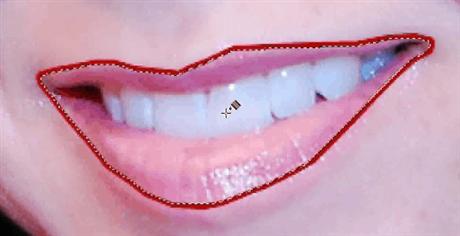
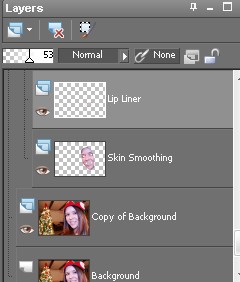
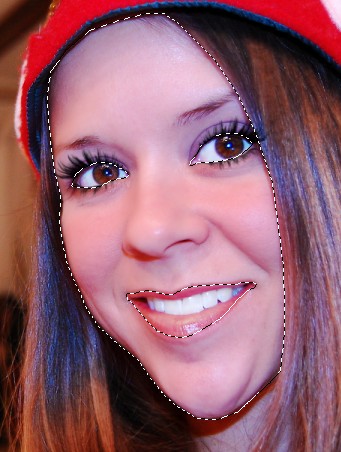
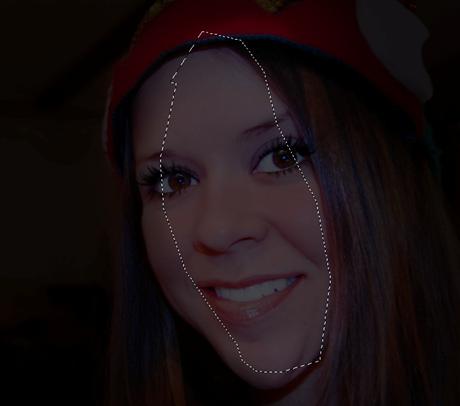
Select the copy of background layer, and then select the outer edge of the face using the Freehand Selection tool (point to point mode). Once the selection is complete, hold CTRL on your keyboard down to subtract areas from the selection, such as the eyes and mouth. Next, save the selection to the alpha channel as we will need this selection again during Step 8. (NOTE: Saving selections to the Alpha channel is a good habit that will allow you to easily make future adjustments without having to make the selections again.)Â With the selection still active, right click the copy of background layer and select Promote Selection to Layer. Rename the promoted selection layer to Skin smoothing. Finally, go to Adjust > Skin Smoothing, and set the amount to about 55 percent (or whatever you desire).
Step 3
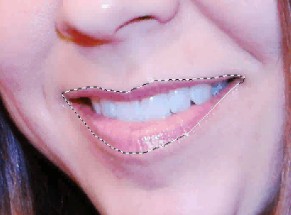
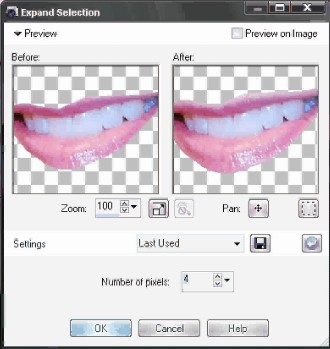
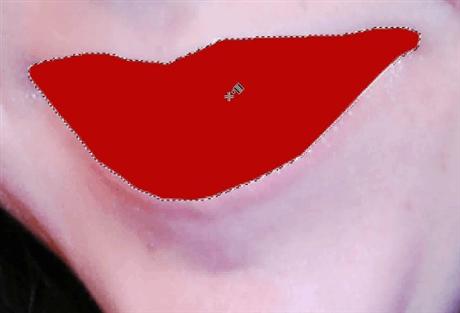
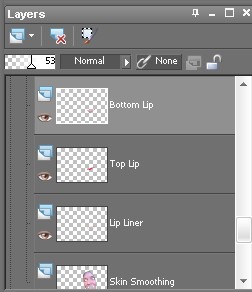
Create a new raster layer, and name it Lip Liner. Select the lip liner layer and make a selection around the outer edges of the lips. Once the selection is complete go to Selections > Modify > Expand, and then set the pixels to around 4. (This will vary depending on the size of the photo, and how thick you wish the lip liner to be. Next, flood fill the lip liner selection with #b30809, or a color of your choice. Then go to Selections > Modify > Contract. Set the contract pixels to the same amount you expanded them. In my case it was 4. Now, press ‘Delete’ on your keyboard, then CTRL+D to deselect. NOTE: If your lip liner selection is a little crooked, use the Warp brush tool to straighten it up some.  Next, go to Adjust > Blur > Gaussian Blur and set the radius to about 2. Finally, lower the opacity of the lip liner layer to about 45 percent.
Step 4
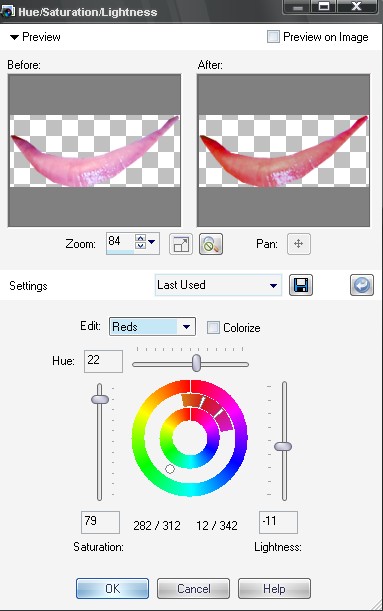
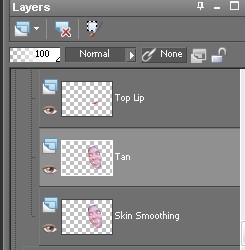
Select the copy of background layer, and draw a selection around the bottom lip. Once the selection is complete, right click on the copy of background layer and select Promote Selection to Layer, and then name the layer bottom lip. Next, go to Adjust > Hue and Saturation > Hue/Saturation>Lightness, and use settings similar to the photo below for a dark red color. Optionally, you can use the colorize tool. Lower the opacity of the bottom lip layer to around 50 or 60 percent. Finally, repeat this step except this time select the top lip, and name the new layer top lip.
Step 5
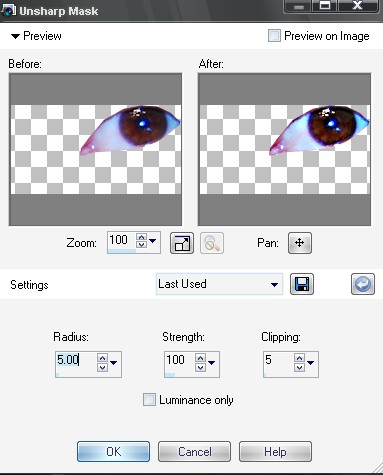
Select the copy of background layer, and draw a selection around the left eye. Once the selection is complete hold down ‘Shift’, and select the right eye. Now, right click the copy of background layer, and select Promote Selection to layer. Name the promoted layer, Eyes Sharpen. Next, select the Eyes Sharpen layer and then go to Adjust > Sharpness > Unsharp Mask. Next, go to Adjust > Brightness and Contrast > Brightness/Contrast and use the settings in image below. Finally, lower the opacity of the Eyes Sharpen layer to around 50 percent, or whatever you desire.

Step 6
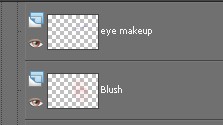
Create a new raster layer and name it blush. Select the blush layer. Now, select a round paint brush using a red color. The size of the brush will depend on the size of the photo you are working with, so adjust it accordingly. Set the hardiness of the paint brush to 50 and the opacity to 3. Next, begin slowly brushing around the cheeks and nose until you are satisfied. NOTE: Make several brush strokes so you can easily undo the previous step just in case you apply too much blush. Also, you can always use the eraser brush with a very low opacity setting to help blend the blush.
Repeat this step except this time create a new raster layer and name it eye makeup. Select a blue color (or color of your choice) and slowly paint the blue strokes over each eye on the eye makeup layer. Make several passes around the bottom of the eye to get a darker coverage near the eyelid.
Step 7
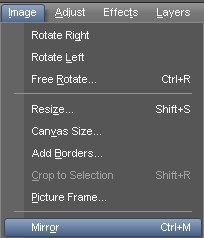
For this step you will need the eyelash brushes. If you don’t have them you can download the eyelash brushes here. Create a new raster layer and name it left eyelash. Select the left eyelash layer and then select one of the eyelash brushes, set the size of the eyelash brush so it roughly fits the eye, and then apply the eyelash. Now, right click on the left eyelash layer and select Duplicate. Name the Duplicate layer to right eyelash. With the right eyelash selected go to Image > Mirror. This will reverse the orientation of the left eye eyelash to a right eyelash. NOTE: The eyelash brushes you downloaded from here only come with left eyelash orientation, so you must mirror them to create the right eyelash orientation. After, you mirror the left eyelash, use the Move tool by pressing ‘M’ on your keyboard to align the right eyelash. Further adjust the size and orientation of each of the eyelash layers using the deform tool. To access the deform tool press ‘D’ on your keyboard. Use the warp brush push tool to align the eyelashes perfectly around the eye.
Step 8
Select, the skin smoothing layer that you created in step two. Right click the skin smoothing layer and select Duplicate. Name the Duplicated layer to Tan. Next, go to Selections > Load/Save Selecation > Load Selection from Alpha Channel, and select the face selection that you saved in step 2 of this tutorial. The selection will prevent you from painting a tan anywhere but on the face. In other words, it will keep brushed strokes inside the selection. Plus it will prevent you from painting any Tan over the eyes, since we subtracted eyes from the selection in step 2. Select the makeover tool, and select the suntan brush and use a strength of about 50, or whatever you desire. Finally, begin painting the tan. Brush slowly to assure you get even coverage.


Step 9
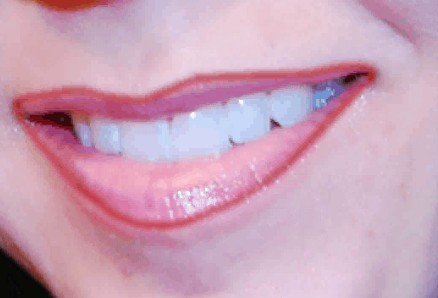
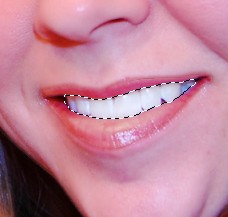
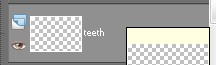
Select the copy of background layer, and draw a selection around the teeth. Once the selection is complete, right click the Copy of background layer and select Promote Selection to a layer. Rename the promoted layer to teeth. Finally, select the makeover toothbrush tool, and apply the toothbrush to the teeth layer. Optionally, you can flood fill the teeth with a white color and lower the opacity of the teeth layer to produce the same effect as the toothbrush tool.
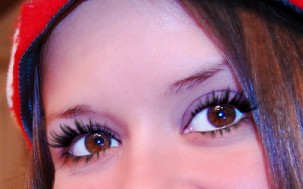
The makeover portion of the tutorial is complete. The next part of the tutorial will cover how to make a Christmas card design using Paint Shop Pro.
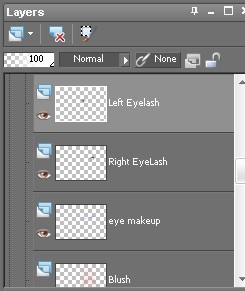
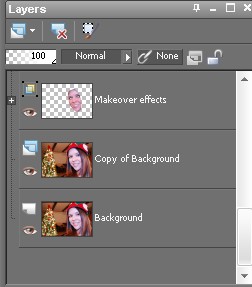
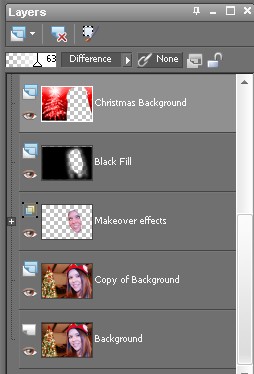
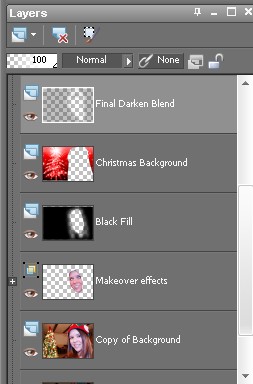
Optional, but strongly suggested: You can group all the makeover effects into one expandable group layer to make the layer palette easier to work with. As you can see below I named the group layer that contains all the makeup/makeover effects to Makeover effects. To create this group layer simply select one of the makeover effect layers such as the left eyelash layer, then Right Click and Select New Layer Group. Then just drag all other makeup effect layers inside the group layer. You will have to drag then one at a time. NOTE: You can still edit any of the individual layers in the group layer by hitting the ‘+’ sign next to the group layer.
Step 10
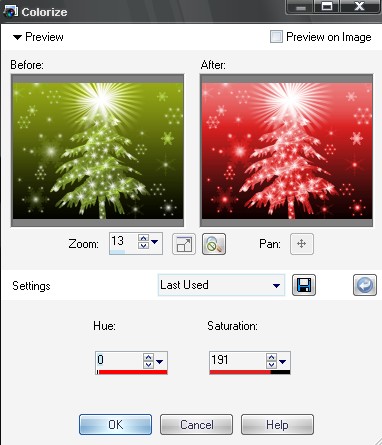
Download a Christmas background. You can find hundreds of free Christmas stock photos at http://www.sxc.hu/. If you want to use the Christmas tree background that I used then here is the link. The background I download was green be default. I simply used the colorize tool to change it to red, by going to Adjust > Hue & Saturation > Colorize, then apply the following settings.

Step 11
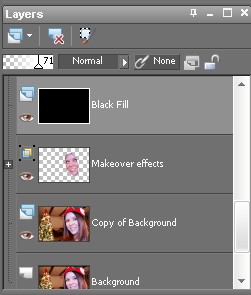
Next, select the copy of background layer and make a selection around outside of the head and hair. Go ahead and save that selection to the Alpha Channel, name it entire head selection. Press CTRL + D to deselect the selection. Next, create a new raster layer over top of the makeover effects and name it black fill. Flood fill the black fill layer with a solid black color. Then lower the opacity of the black fill layer to 71 percent. With the black fill layer selected, draw a selection in the middle, and more toward the right of the face. NOTE: The selection doesn’t have to be perfect. The reason I made the selection more to the right is because I wanted to simulate a light source shining on my wife from the right, thus creating some shadow on the left side of her face. Now, go to Selections, Modify, Feather, and feather the selection to around 25, and then press Delete. Finally, select your eraser tool using a large very large brush size, (at least a brush half the size of the face) and set the hardness to 5 and the opacity to 5 percent. Gradually brush around the face until you archive somewhat realistic shadowing and lighting effect.

Step 12
Create a new raster layer and name it Christmas Background. Copy the Christmas Background you selected into this layer, and use the deform tool to resize the image to fill the entire background. Next, set the Blend Mode of the Christmas Background Layer to ‘Difference’ and set the opacity to 63. Load the entire head selection from the Alpha channel onto the Christmas background layer, once the alpha selection is loaded press ‘Delete’ on your keyboard.
Step 13
Create a new raster layer named Final Darken Blend. Select the paint brush tool and set the color to black and the brush opacity to 25 percent. Next, slowly paint around the hair lines, and over the rest of the image to further blend the head with the background.
Step 14
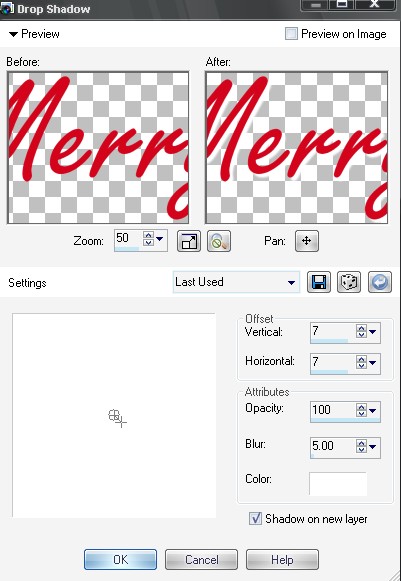
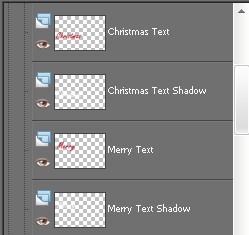
Create a new raster layer named Merry Text. Set the foreground and background colors in the materials palette to #d2061b or a color of your choice. Select the text tool and set the font size to whatever size you want to use. Type in “Merry” on the Merry Text layer. Then go to Effects > 3d Effects > Drop Shadow, and use settings similar to the photo below. Repeat this step except this time create a new layer and name it Christmas Text, and use the word “Christmas” instead.

Step 15
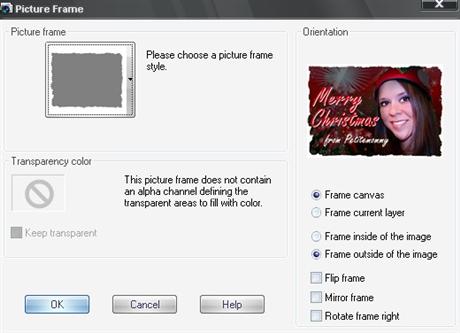
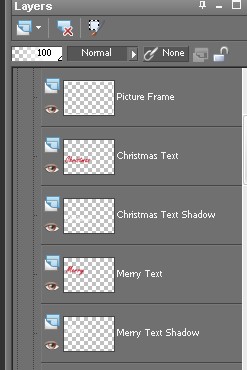
Finally, create a new raster layer named Picture Frame. With the Picture Frame layer selected go to Image > Picture Frame and select the Edge Brush frame.
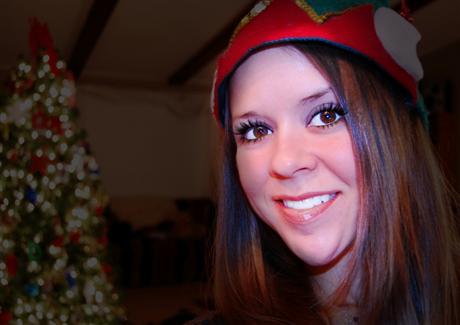
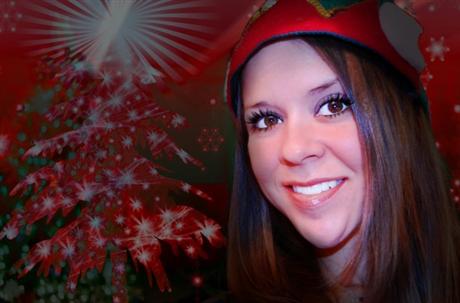
Final Results
Click to view full size.

10 Responses
really nice job
Great Job and Thank you for all those good tutorials. That makes understanding PSP X2 much more easier.
With greets from Germany,
Daniel
[…] a tutorial on how to make your own homemade Christmas Card like this one please visit PaintShopblog.com It’s a terrific resource! addthis_url = […]
Great post. Thanks for sharing!I also have an PSP downloading website to recommend. Check out at my website.300
hi! this is a really great tutorial! it helped me alot on learning how to use make up and brushes, considering that now i’ve started working with layers after a few months of figuring out what corel paint shop’s all about.
anyway, i wanted to ask you to make a tutorial on how to chance hair color so it could look more natural. i usuallu use the tan bruch on my light brown hair and i get a really nice redhead look. but, if i want to see how i look blonde for example, how do i do it? can you please make a tutorial on this? it would not only help me, but others as well. thanks a lot and keep up the good work, you’re awesomely good! take care!
oh, sorry for the spelling mistakes in the previous comment, i tend to do that! :))
anyway, can you please email me your reply at:
stefania_carmen_misaila@yahoo.com
i would really appreciate it! thanks again and good luck
I thought I wasnt going to like this blog but more I read the more I liked it.
Thanks so much! Love all the info in an easy to understand directions.
Great tutorial! It used to work peefrctly; but now I am having a problem with the transform tool on the same computer, same program. I’ve tried all that you already recommended to other people who had the transformer box all over the image instead of over the brush. Tried Ctrl and [ or ], and Ctrl and all other signs and letters on the keyboard lol; but it doesn’t do anything. Any other suggestions? It’s really frustrating, after you already tried it and it worked so good. Please help!
Excellent work.
Please more …
Greetings from Spain.