
My boys requested this tutorial. I’m really not sure what to call it. I suppose how to make someone look older, or how to create wrinkles in Paint Shop Pro will be sufficient.
Anyway, they (my boys) wanted to see what their mommy would look like when she got older. I have never attempted any aging makeovers in the past. Most people request the opposite, they want to look younger. I decided to give the aging makeover a try, and you can follow the steps I used to achieve this effect/makeover. It’s by no means perfect but it did turn out, in my opinion, reasonably realistic. My oldest son said, “Dad, that looks just like Nanny.” Nanny is my wife’s mother. However, my wife said, “I look just like a witch, and you should name the tutorial how to create a witch in Paint Shop Pro.” Yeah, she is full of constructive criticism. I think I achieved a somewhat realistic effect, but I will leave that for you to decide. After all, a witch tutorial should be fun, right?. Btw, this is a very easy tutorial, it’s just long. It will probably take you about 35 to 40 minutes to work through this. Well, enough rambling from me. Lets get started.
Youtube Video
Step 1
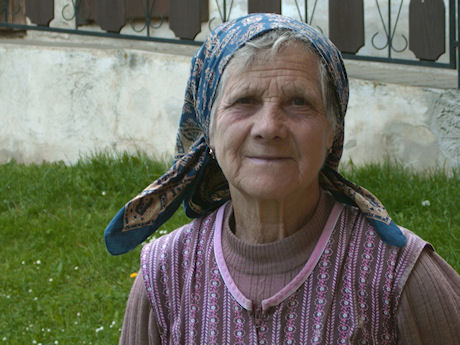
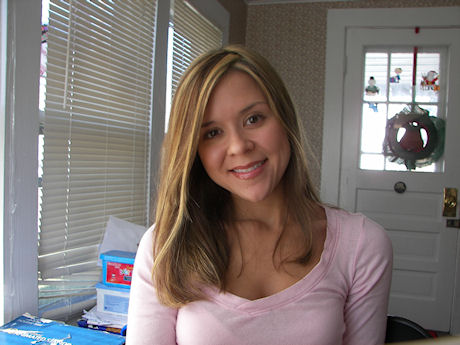
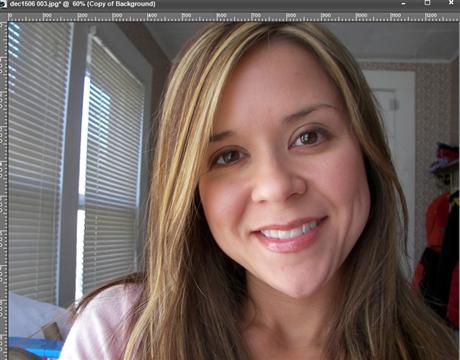
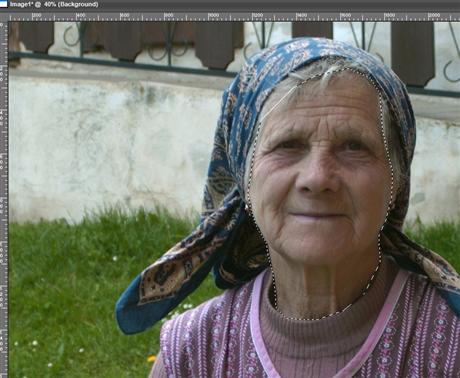
Find a photo of an older person, and open it up. I used this free stock photo of this lovely old lady. Next, open the photo of the person you are going to be aging. I used a photo of my beautiful wife. If you would like to follow this exact tutorial , you can download the same photo I used of my wife by clicking here. Below are the two photos I will use. NOTE: Try to use photos with faces that are positioned similar.
Step 1-B
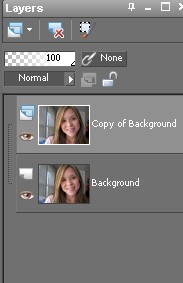
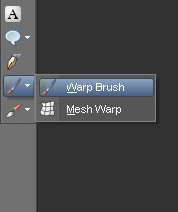
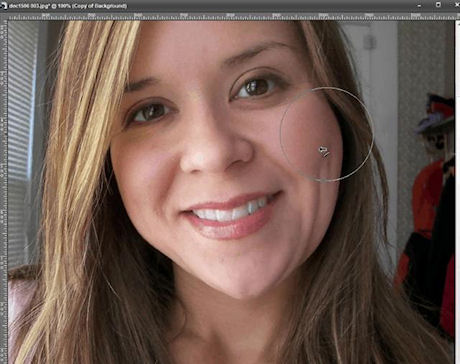
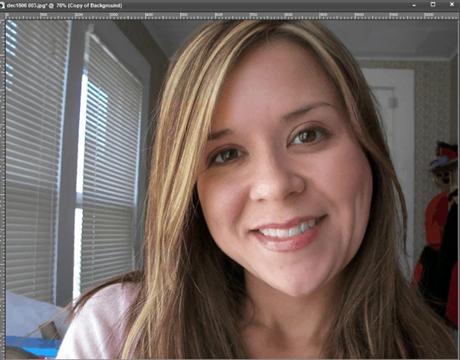
Select the photo of the younger person, right click the on the background layer in the layers palette, and select duplicate. Now, select the copy of the background layer and then select the Warp Push Brush tool. The size you set your Warp Brush will depend on the size of the images you have chosen to work with. I used a size of 300. The larger the size the more even the push will be. Next, use the Warp push brush to extend the jaw down and out a little bit. You can also droop the lips a little if you like. This will simulate the drooping of skin and puffiness that comes with aging.

Step 2
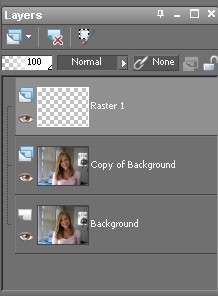
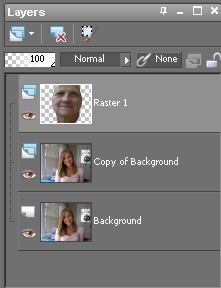
Now, create a new raster layer on top of the Copy of the background layer. See photos below for example. Select the picture of the old lady and make a selection around the face and neck area using the FreeHand Selection with the selection type set to point to point. Once the selection is complete go to Edit > Copy. Finally, select the Raster 1 layer again in the younger photo, and select Edit > Paste as New Selection.
Step 3
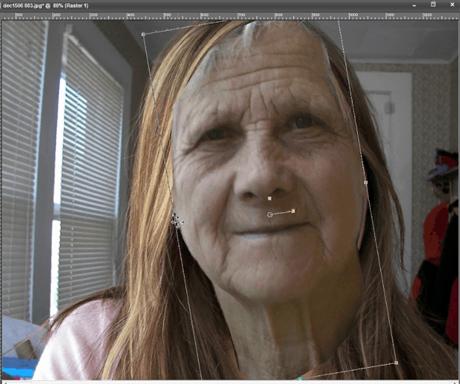
With the Raster 1 (older face) still selected press ‘D’ on your keyboard to pull up the deform tool (set to mode scale) to align and scale the face with the younger face. NOTE: The outside nodes of the deform tool are used to re-size the face. The center anchor node of the deform tool has a handle that will appear when you mouse over it, that will allow you to rotate the selection from. If you need to, you can lower the opacity of the Raster 1 layer to around 40 percent or so to help you align the eyes. Try to get the eyes aligned as close as possible, the rest doesn’t matter as long as you have older skin covering all areas of the younger skin.

Step 4
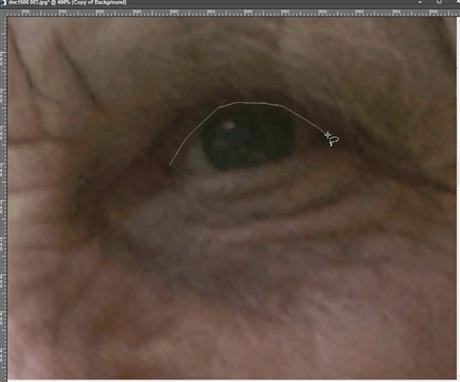
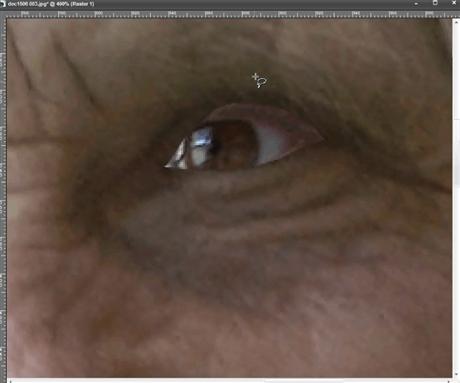
Now that the old face is aligned. till working with Raster 1 (older face). Select the Freehand Selection tool using point to point mode to outline the right eye. Once the outline is complete, press ‘Delete’ on your keyboard to remove that selection. Then press Ctrl + D to deselect. Now, with the selection removed, pull up your Warp Brush tool and set the mode to ‘Push’ and set the size to around 100, or a size that works best for your image. Now, use that warp brush shape and align the cutout portion of the eye socket with the younger eye underneath. Next, lower the opacity a little, then align the nose/nostrils and the smile wrinkle lines using the same warp push brush. NOTE: The alignments don’t have to be perfect right now, you can make more adjustments later as needed.
Step 5
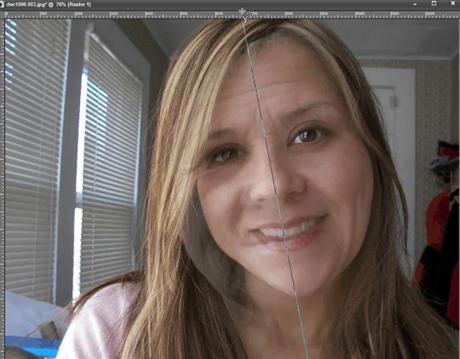
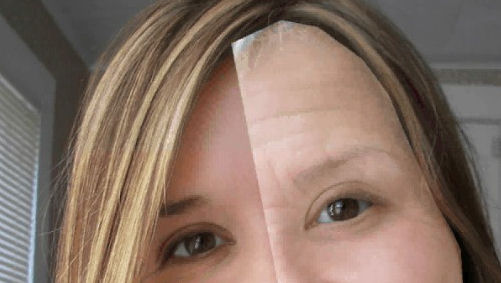
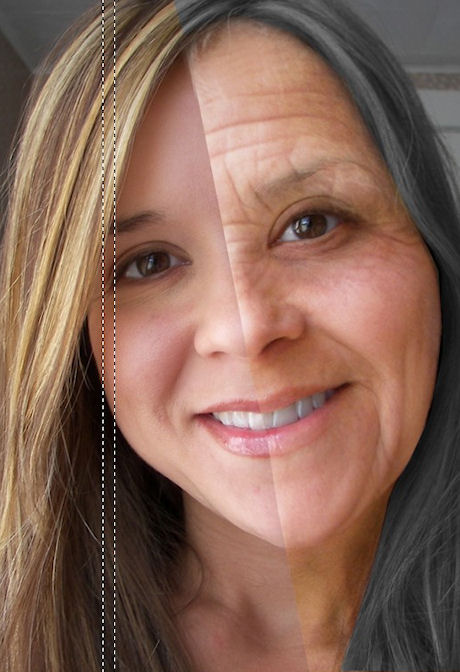
Still working on the Raster 1 (older face) layer, select the freehand selection tool (point to point mode) and draw a straight line that splits the face into two halves. After you have the straight line down the middle of the face, go ahead and complete the selection by drawing a square box. Then press ‘Delete” to remove the left half of the face. See photos below for example.

Step 6
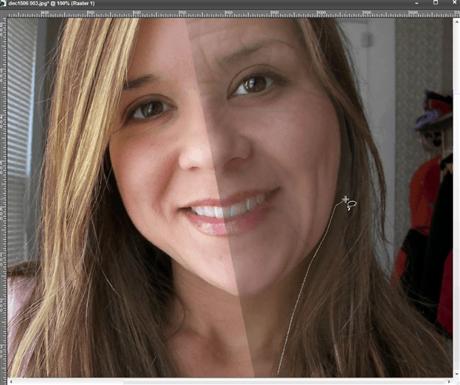
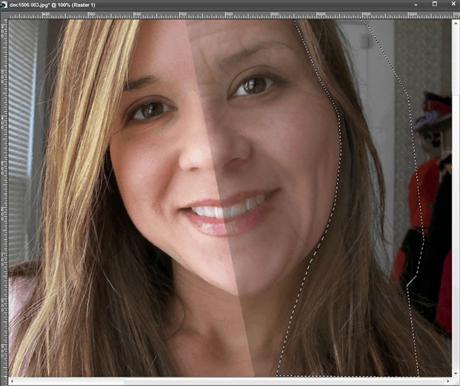
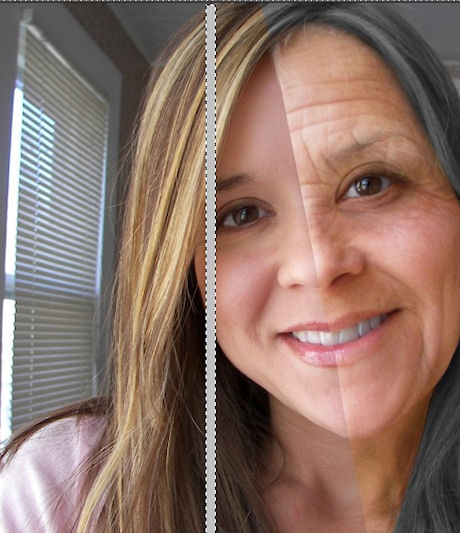
Still working on Raster 1 (older face) layer, lower the opacity and outline the right side of the younger face and neck line using the Freehand selection tool (point to point mode) and then press “Delete” on your keyboard to remove any of the older skin texture that may be overlapping. Then press Ctrl + D to deselect.
Step 7
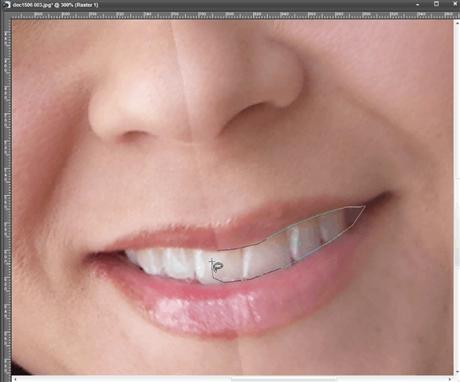
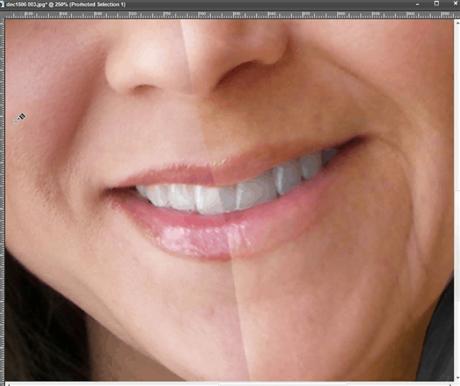
Still on Raster 1 (older face) layer, outline the out edge of the teeth and press the ‘Delete’ key on your keyboard. Then press CTRL + D to deselect. NOTE: If your photo subject is not smiling or showing teeth, you can skip this step.
Step 8
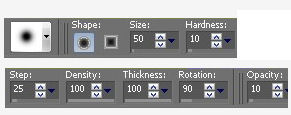
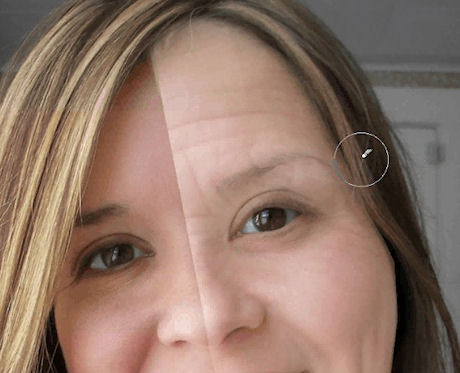
Next, turn the opacity of the Raster 1 (older face) layer back to 100 percent, and set the blend mode to “Screen”. Select the eraser tool and use eraser brush settings similar to the settings in the photo below. The lower opacity setting will allow us to gradually erase old face edges creating a natural blending effect along the hair and jaw lines.
Step 9
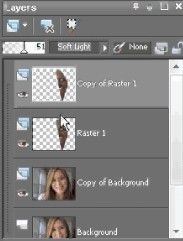
Duplicate the Raster 1 (older face) layer. Select the new Copy of Raster 1 layer and set the blend mode for the layer to “Soft Light”. Remember to leave the Raster 1 set to blend mode screen. NOTE: You can adjust/experiment with the opacity of each of these layers to achieve the most natural result. The opacity settings will vary depending on the colors and the amount of lighting in the photos you are using. You can see in the photo below my experimentation with the opacity. Mine ended up looking the best around 95 percent.
Step 10
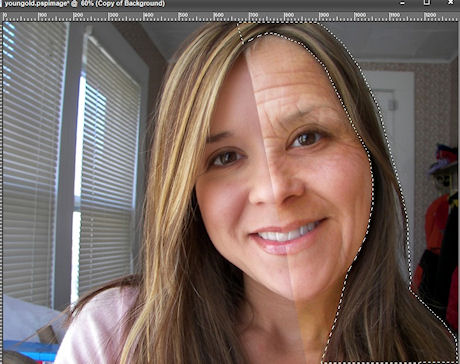
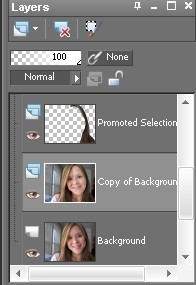
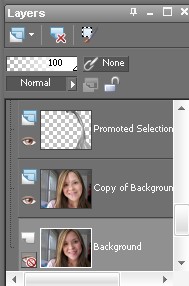
Next, select the Copy of Background layer and outline the right side of the hair using the Freehand Selection tool set to point to point mode. Once the selection is complete, right click on the Copy of Background layer and select Promote selection to Layer. Then press CTRL + D to deselect.

Step 11
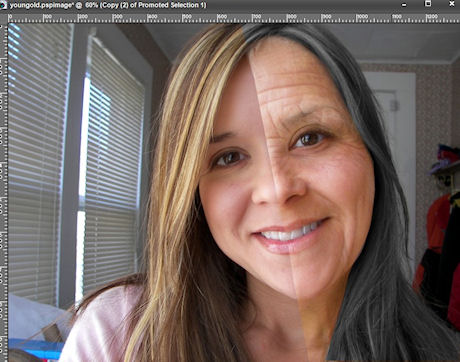
Select the Promoted Selection (hair outline) layer and set the blend mode of this layer to “Color”. Next, go to Adjust > Color > Channel Mixer and use settings similar to the photo below to get that gray look. Note, you can lower the opacity some if you have too much gray. If necessary, you can also use the eraser tool like we did previously to blend the hair with the face. If for some reason, you don’t have enough gray, you can duplicate the Promoted Selection (hair outline) layer as many times as need to create more gray.

Step 12
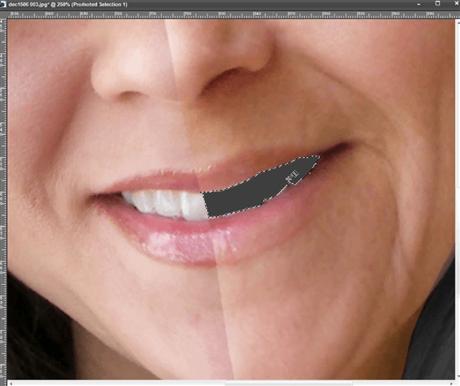
Select the Copy of Background Layer, then outline the teeth. Once the teeth are outlined, right click on the Copy of Background Layer in the layers palette, and select Promote Selection to Layer. Now, flood fill the Promoted Selection (teeth) with a black color. Next, lower the opacity to around 15 percent. This adds some discoloration to the teeth. NOTE: If your picture doesn’t have teeth showing then you can skip this step.
Step 13
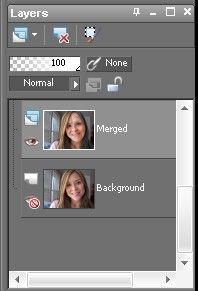
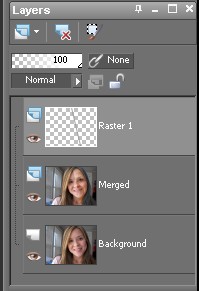
Toggle the visibility off for the Background layer (should be the bottom layer). Now, select the Copy of Background Layer in the layers palette, right click and select merge visible. This will leave you with two layers, Background and Merged. Turn the visibility back on for the background layer. Then toggle the visibility of the merged layer on and off to compare/view the changes you have made. NOTE: Click the eye next to a layer in the layers palette to toggle visibility on and off for that particular layer.
Step 14
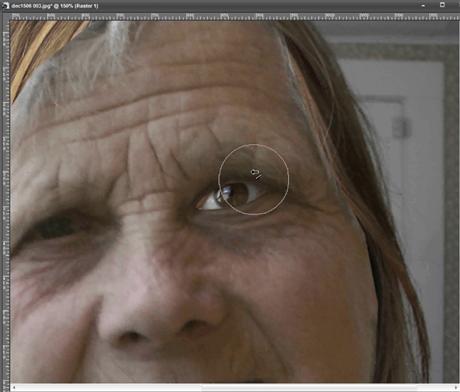
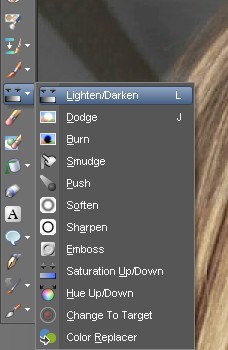
Next, select the Merged layer, and grab the the warp brush push tool and make adjustments as needed. For example, I added a little more sag to the lips. Also I used the lighten/darken brush to add some darkness under the eyes. See photos below for settings I used. NOTE: When painting with the lighten/darken brush you press the right mouse button to darken areas, or the left mouse button to lighten areas.


Step 15
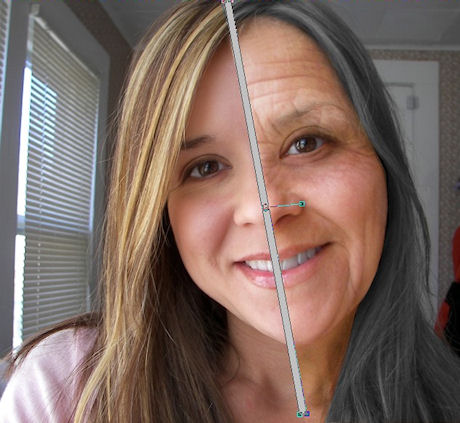
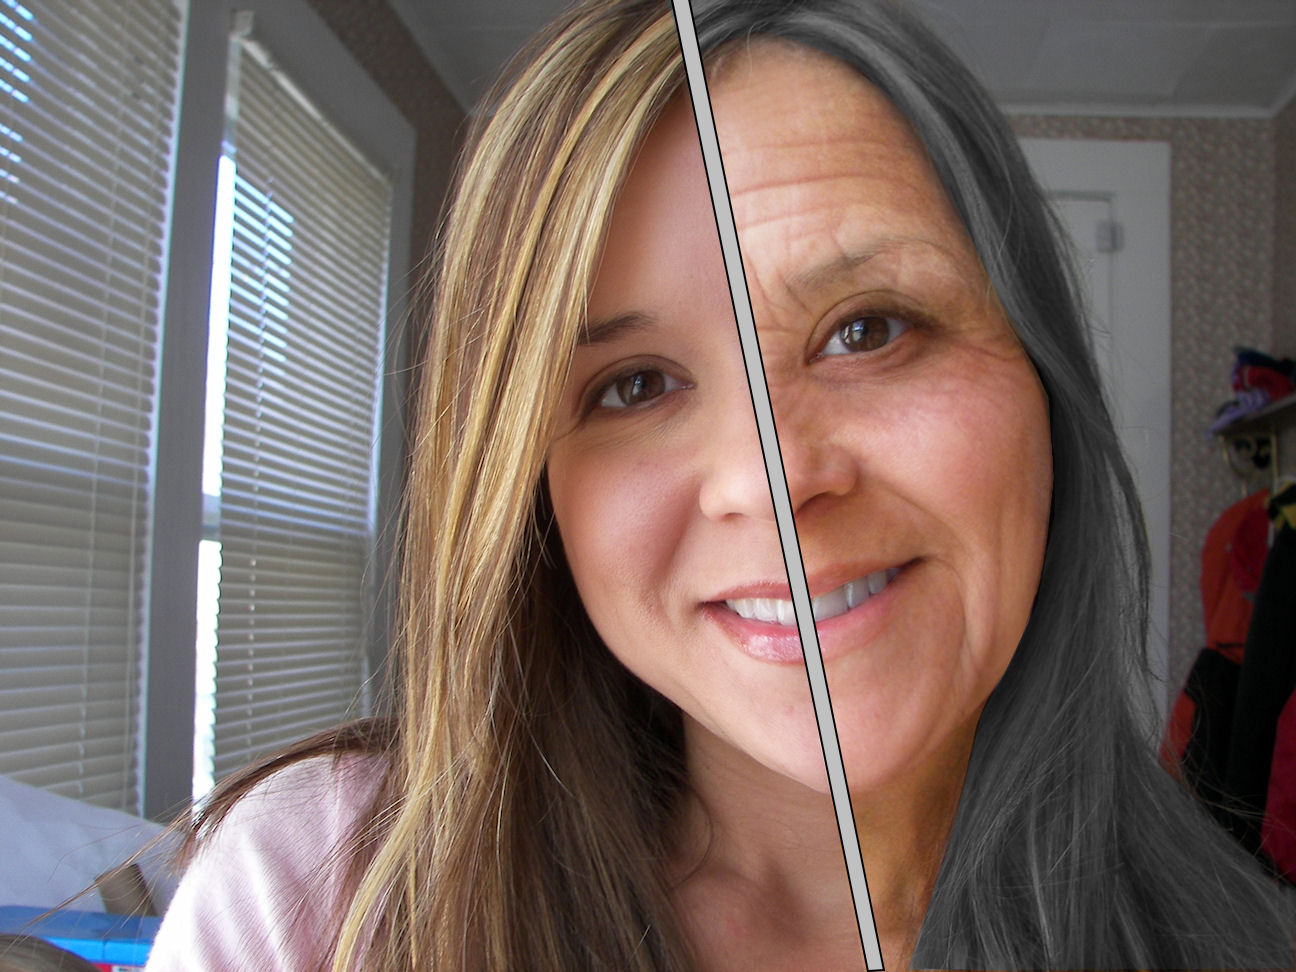
Finally, create a new Raster Layer by right clicking on the Merged Layer and selecting New Raster layer. Select the newly created Raster 1 Layer and draw a long skinny rectangle using the Rectangle Selection tool. Next, select a gray color (or whatever color you want) and Flood Fill the selection. Then press CTRL + D to deselect. Now, press ‘D’ on your keyboard to pull up the Deform tool. Use the Deform to rotate and scale the Rectangle separator into position. We are done!
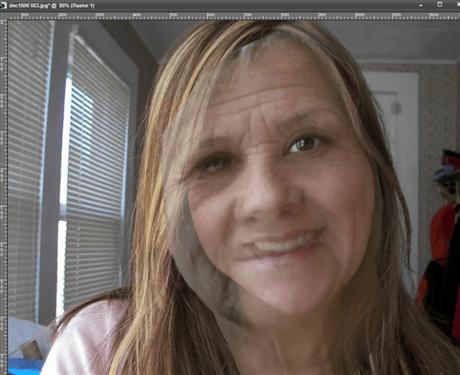
Results
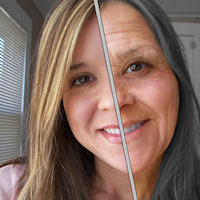
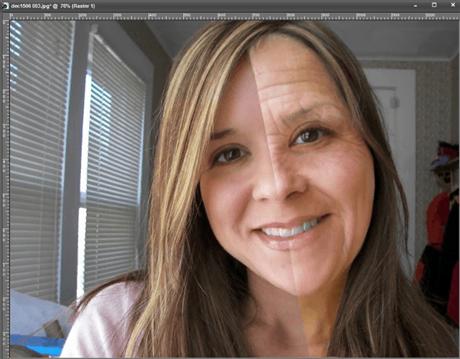
If you followed the tutorial correctly your results should look similar to what I achieved below.
5 Responses
very nice job….
I will most certainly give this a whirl if we dont have to upload any other type of plugin or programs im all for the tools we have at hand in psp.. GOOOD JOB!! ill email my results in a weekish lol..
that’s weird but it’s cool. B-]
WOW!!! That really works!! Great tutorial, thanks.
Also delete spam 😛
Pretty cool tutorial, Google brought this up as first result after looking for just such a tutorial for a project, tried it and it worked great. Will check out the rest of your site.
I did it in PSP X2.