
In this tutorial we are going to learn how to create round corners in Corel Paint Shop Pro X2. We are also going to apply an optional soft/faded edge effect. I have had several people request this tutorial, including my wife.
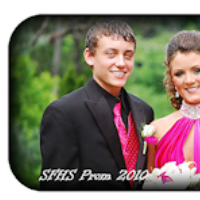
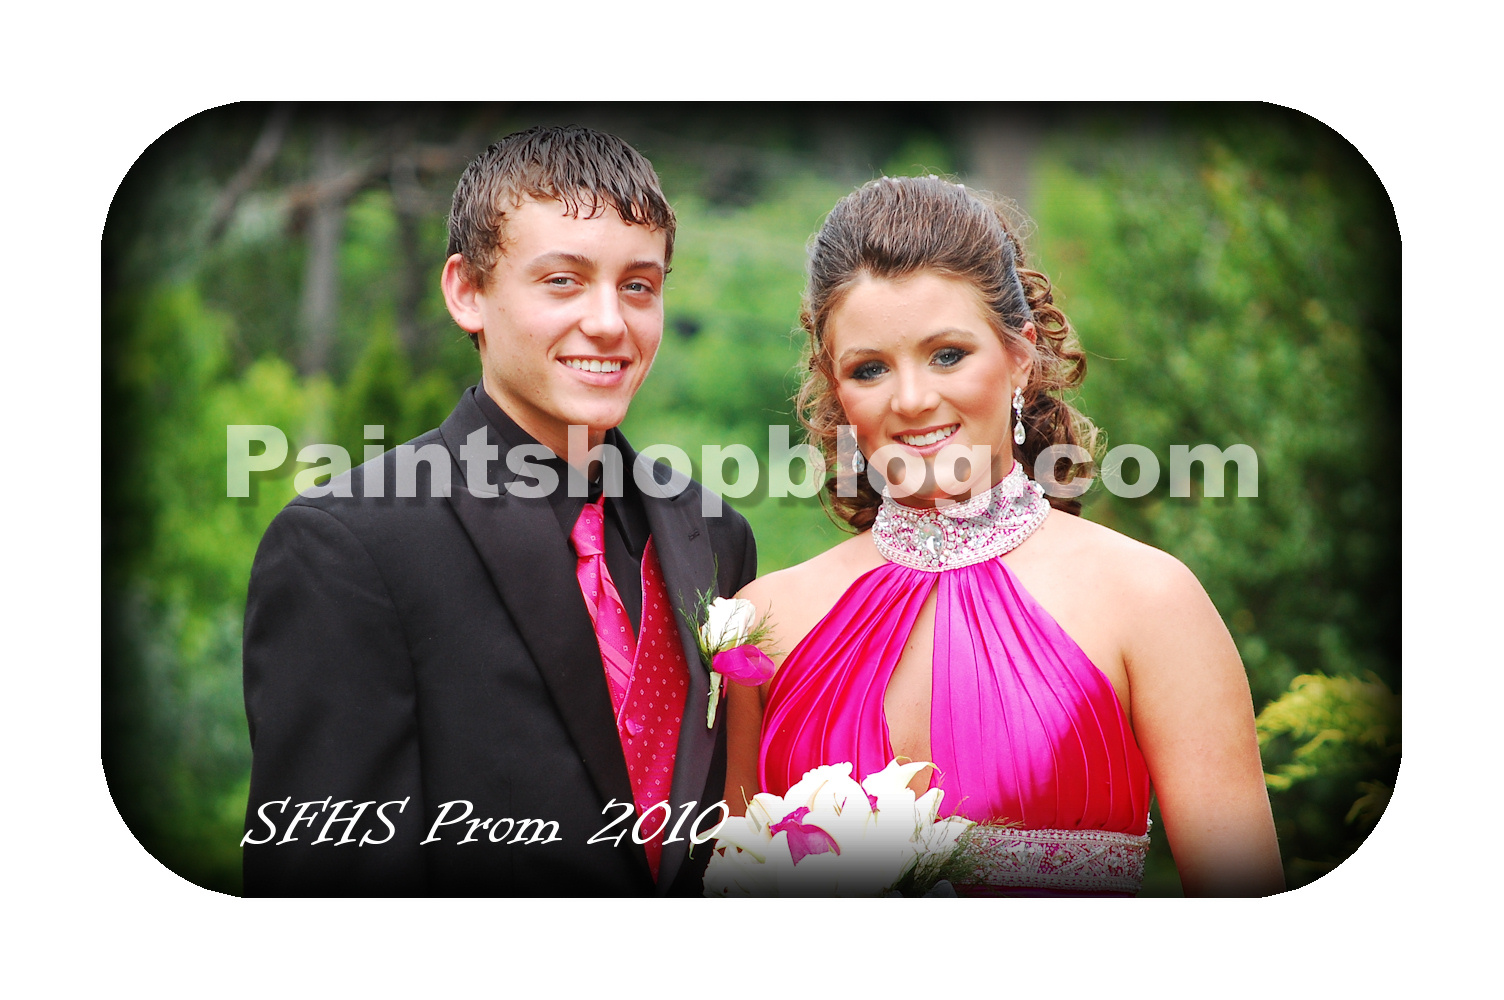
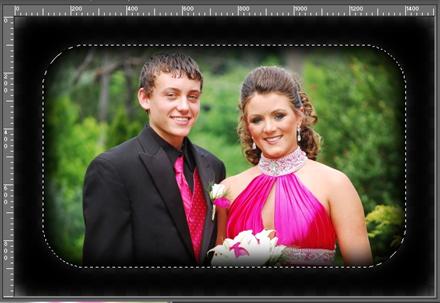
Apparently creating rounded edges in Paint Shop Pro and/or Photoshop is a popular asked question among Mom’s. For this demonstration I used a beautiful photo of my cousin Jordan and his prom date. The photo was taken by my wife before they left to the 2010 South High School here in Eastern Kentucky. This tutorial can also be used to create round corners in Photoshop or any other graphics editing program as well. Basically, all we are doing is drawing a Rounded Selection, inverting that selection, and deleting the outside of the selection. I will walk you through the step by step process.
Preview

Step 1
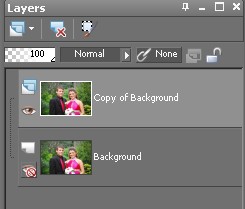
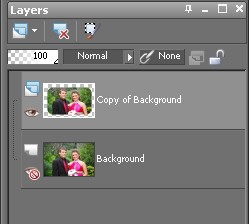
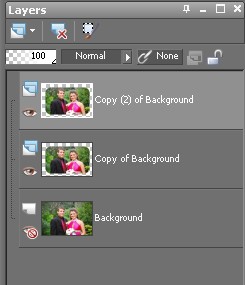
Open the image you want to add rounded edges or corners to in Corel paint shop pro X2. Next, right click the background image in the layers palette and Select Duplicate. Finally, turn off the visibility in the Background Layer.

Step 2
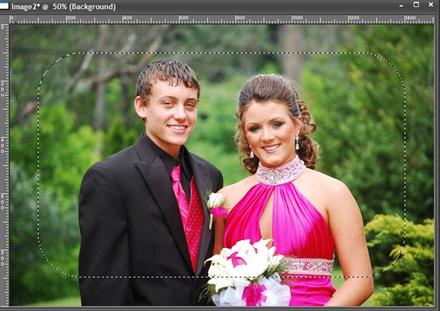
Press ‘S’ on your keyboard to select the Selection tool. Set the Selection type to Rounded Rectangle.

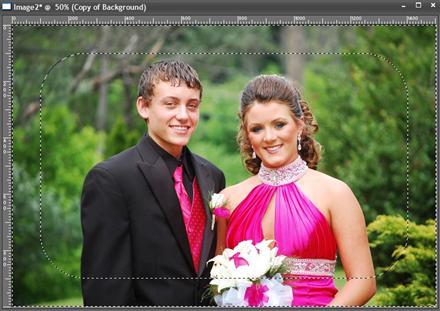
Step 3
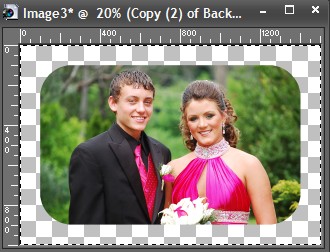
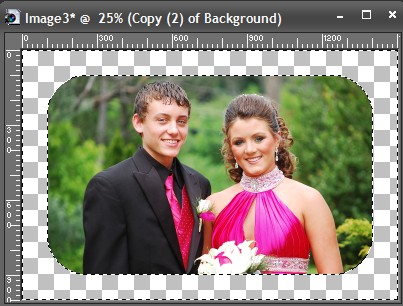
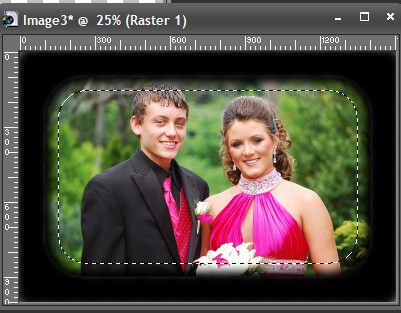
With the Copy of Background Layer active, place the cursor on the photo and draw the selection on the area of the photo you want to keep.
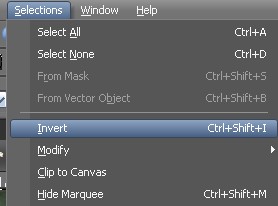
Step 4
With the selection active go to Selections > Invert or press (CTRL+SHIFT+I).
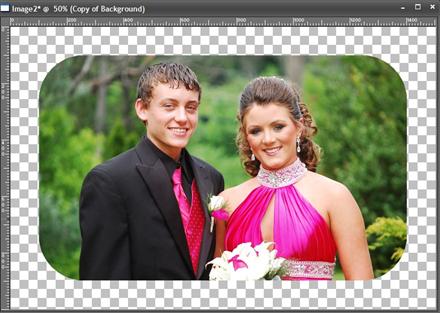
Step 5
Press Delete and then CTRL + D to Deselect.
Step 6
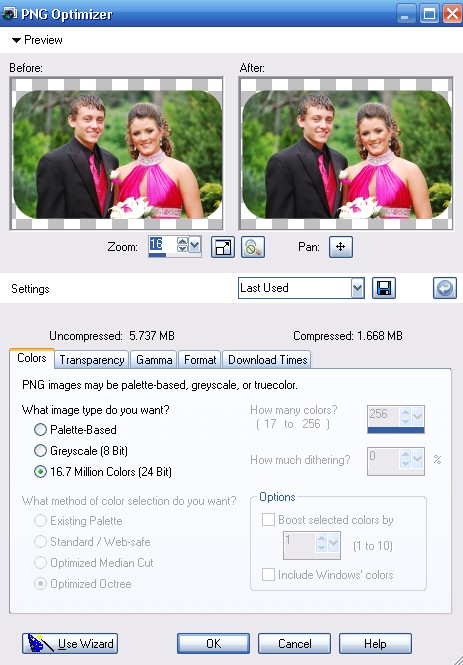
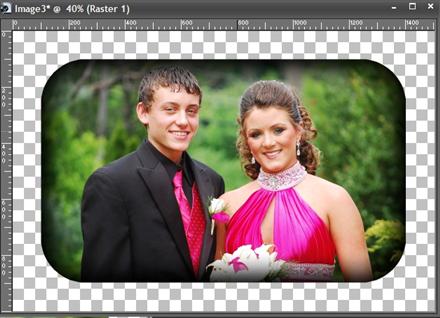
Finally, export as PNG or GIF if you want to keep the background transparent. File > Export > PNG Optimizer or GIF Optimizer. Optionally, you can make your rounded corner photo really stand out by adding some soft edge effects with Paint Shop Pro. SKIP STEP 6 and Continue to step 7 if you would like to add a soft edge effect.
Continue if you would like to add soft/faded edge effects.
Step 7
Duplicate the Copy of Background layer.
Step 8
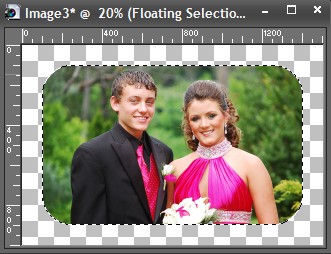
With the Copy (2) of Background layer active Press CTRL+A to place a selection marquee around the entire layer. Now, Press ‘S’ on you keyboard to activate the selection tool. Finally, place the selection cursor anywhere on the photo and left click once. The marquee will now be wrapped around outer edges of the cropped portion of the photo.
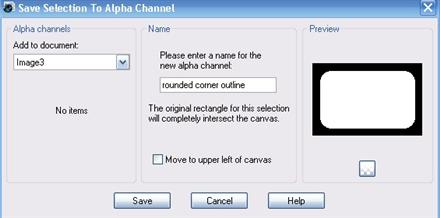
Step 9
Go ahead and save the selection to the alpha channel. Selections > Load/Save Selections > Save Selection to Alpha Channel. I named mine “rounded corner outline.”
Step 10
Invert the selection. Selection > Invert or press (CTRL+SHIFT+I).
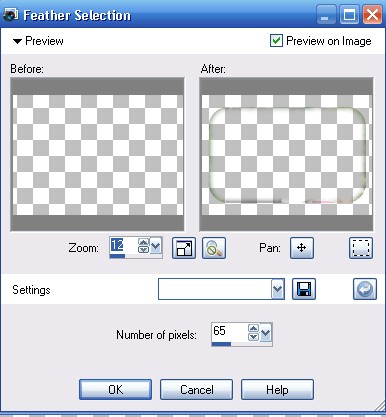
Step 11
Next, Feather the Inverted Selection. Selection > Modify > Feather or press (CTRL+H). I set the number of pixels to 65. This number will vary depending the size of your photo and/or the size you want the soft edges to be. Keep the feather selection active.
Step 12
Right Click the Copy (2) of Background layer in the layers palette, and select New Raster Layer. The feather selection should still be active.
Step 13
Flood Fill (Press ‘F’) the background with black (#000000) or the color of your choice, on the Raster 1 Layer. You can repeat the flood fill until you are satisfied with the amount of coverage. OPTIONAL, save the feather selection to alpha channel so you can easily come back later to change and/or experiment with other colors. Go to Selections > Load/Save Selections > Save Selection to Alpha Channel.
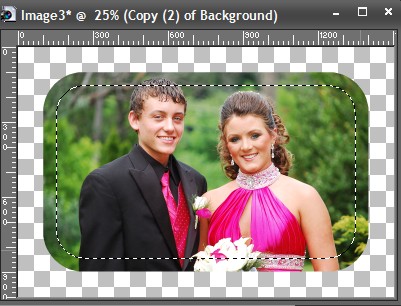
Step 14
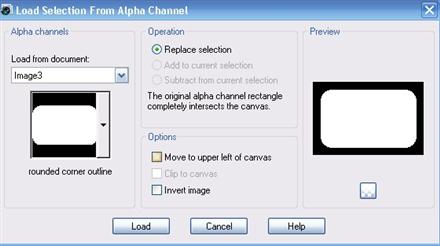
Press Ctrl+D to Deselect. Next, go to Selections > Load/Save Selections > Load Selection from Alpha Channel and Select the “Rounded Corner Outline” we saved earlier. Once the selection is loaded. Go to Selections > Invert (CTRL+SHIFT+I). Then Press ‘Delete.’ Finally, CTRL+D to deselect. Note: You can lower the opacity of the Raster 1 layer if it is too dark.
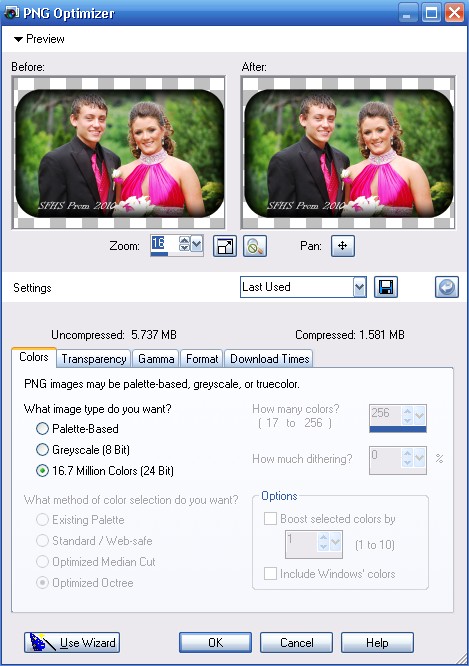
Step 15
Finally, export as PNG or GIF if you want to keep the background transparent. File > Export > PNG Optimizer or GIF Optimizer. Preferably you should use PNG because the GIF files will lose a tremendous amount of quality due to limited colors available to the GIF images.
Final Result
19 Responses
Fantastic torQQue!! Thanks for this!!
I just tried it and it works great! Try playing with the layer modes on the raster layer in step 14, after lowering the opacity (or not), I got some awesome results with several different modes!
Thanks so much for this tutorial! I am using PSP X, but it still worked pretty much the same way. Much appreciated, thank you!
Brilliant tutorial I’ve used something similar to this before in photoscape though not yet tried it on photoshop, will give it a go, thanks for sharing.
Brillant tutorial, I am using PSP X. Much Appreciated, Thank you!, I wish you an excelent new year from Mexico….
Thanks so much for this tutorial!
nice, Thanks so much
I’m just wondering how to get the white box from around my picture?
I was wondering the same as Amber…the white box does not look good. What can be done to make it look better?
tks for your help. it worked out for me: the rounded corners
barry
This is ace!
BUT re: step 1- How do you “turn off the visibility in the Background Layer”?
Cheerz
Oh yeah, and that shitty little white box…did yous find out how to erase it at all?
Many Thanks
Thanks so much. I have been looking for tutorials so that I can learn how to work with my program. You explained everything perfectly and I was able to go step by step!
Thank you so much. I have been looking for how to do this for a little while now. Great tutorial.
This tutorial did’nt help me at all. I found the whole thing to be quite confusing and it just seemed to me that parts of the instructions are missing. I could’nt get it to work.
About the white border, you would have to click the magic wand in that area and then do a “crop to selection”.
My question is: what if we don’t want the corners THAT round; still rounded but less round than the default “rounded rectangle”? Can you change the amount of roundness?
Fell out of bed feeling down. This has brithgened my day!
After that we will create background step by step…Now create a new one layer after that get out Rectangular Marquee Tool and make selection as on picture below and fill it with color of 302f13 . Select Rectangular Marquee Tool again and make the selection of about half the remaining black field then create a new layer and fill it with colors of 2a400f and 1a2f06.. Now get out Single Row Marquee Tool create a new layer and fill the selection with a black color.
Thank you for sharing this information