
This is a step by step tutorial (with images) designed for absolute beginners. In this tutorial, you will learn how to easily cutout/remove objects from your photos,
and you will learn how to remove backgrounds using the point to point freehand selection mode. Do you have the shaky mouse syndrome when making freehand selections? Don’t worry if you do. Point to point selections gives you complete control when making selections. Anyone can make nearly perfect selections using this method. You will also learn how to use the contract and feather tools to make your cut outs blend nicely when applied to new backgrounds.
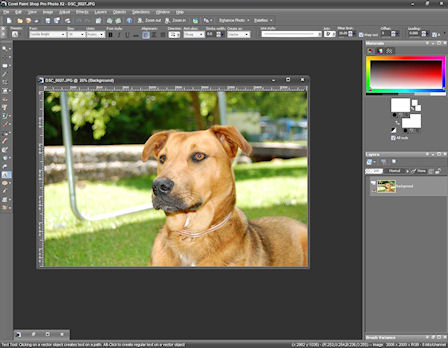
Step 1
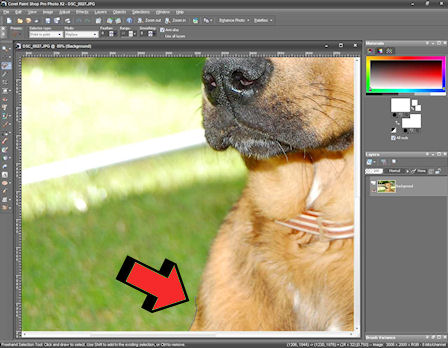
Open up the image you want to cut an object from.
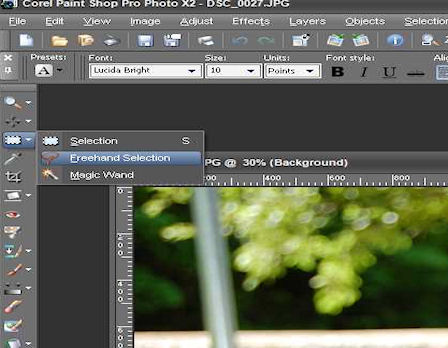
Step 2
Locate the “tools” toolbar located on the left hand side of PSP. Select the Freehand Selection Tool located under the “Selection tools” sub-menu.
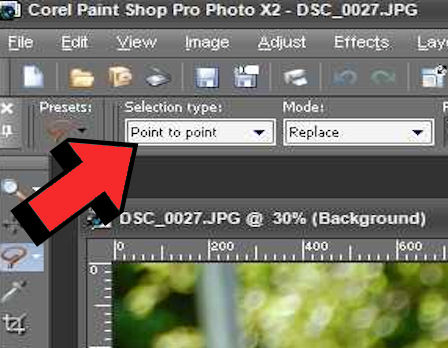
Step 3
Set the Selection type to “Point to point” and set the Mode to “Replace.” NOTE: Using “Point to Point” will allow you to select an object in incremental steps. Essentially, you are placing points on the edge, and PSP will use those points to follow the path around the entire object. Trust me, this makes cutting out even the most difficult objects a breeze. You’ll be a pro in no time 🙂
Step 4
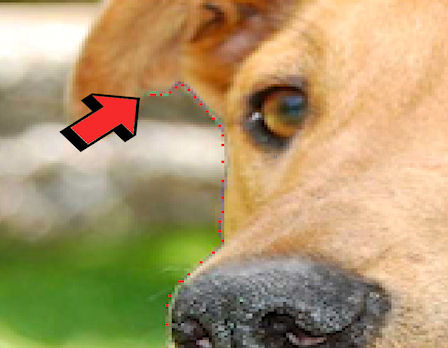
With the Freehand Selection tool selected, pick a spot on the object to begin laying down points. NOTE: (Lay down a point by pressing the left mouse button.) I started laying down my points in the left-bottom corner of the dog. Click the left mouse button to create the first point. Now, move your mouse slightly up the edge of your object, and lay down another point by clicking the left mouse button. Notice how PSP is following the points as your are laying them down. Very Nice!
Step 5
Keep placing points around the edge of the object. NOTE: (I added the red-dots to roughly represent the incremental points I made during my selection)
Step 6
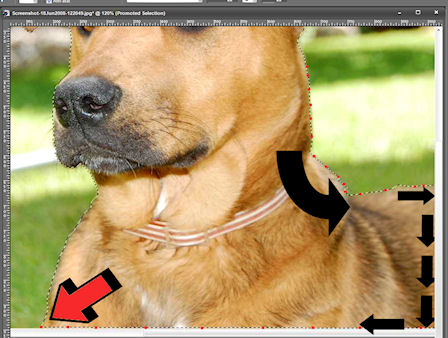
Keep repeating Step 5 until you reach your original starting point. Once you have made it back around to the original starting point, just click the Right Mouse Button to complete the selection.
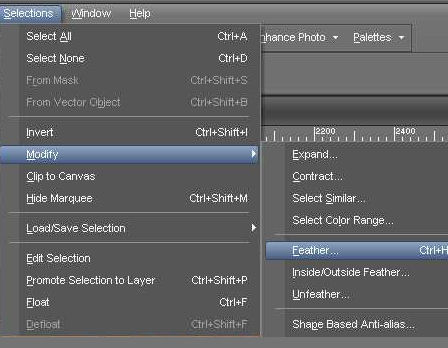
Step 7
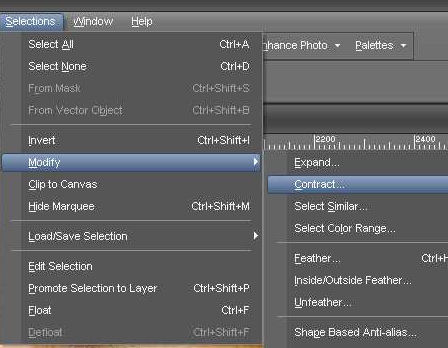
With the selection complete. Go to Selections > Modify > Contract.
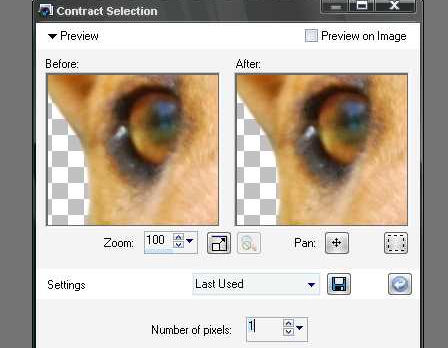
Step 8
Set the Contract Selection Number of Pixels to 1. Press OK. Note: (This contracts your original selection in 1 pixel to give you a cleaner selection.)
Step 9
With the selection still active, go to Selections > Modify > Feather.
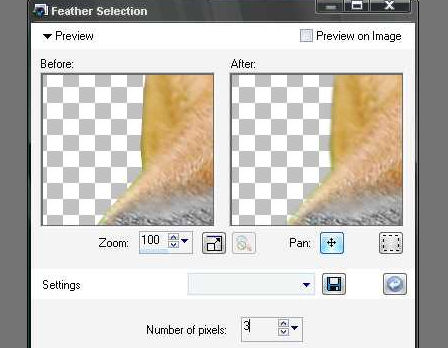
Step 10
Set the Feather Selection Number of Pixels to 3. NOTE: Feathering will give your object smoother edges, allowing it to blend better when applied to new backgrounds.
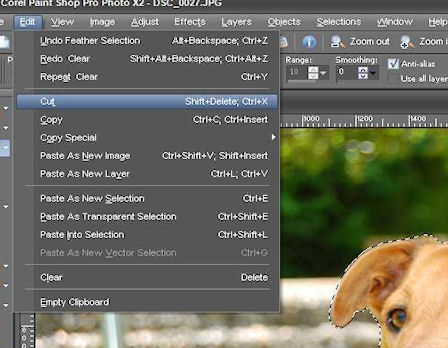
Step 11
With the Selection still active, Go to Edit > Cut
Step 12
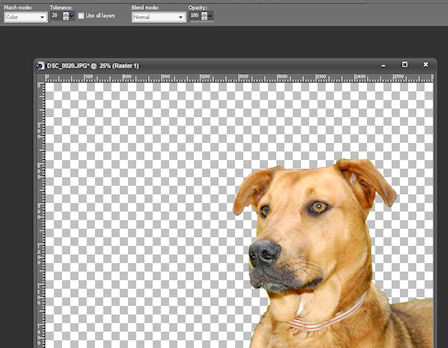
Go to Edit > Paste As a New Image. Note: This creates a new image on a transparent background.

Step 13
Now, that you have your object cut out, it is ready for all your future projects. NOTE: (Don’t forget to save! You can save it as pspimage by going to File > Save As > pspimage and/or export it as a picture tube by going to File > Export > Picture Tube.)
Step 14
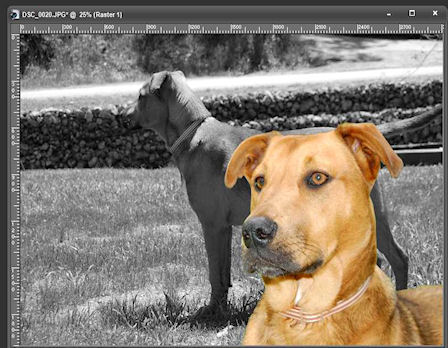
This is optional step. Simply open up a new photo and copy and paste your object 🙂
30 Responses
it’s really hard yo cut it out
hi have got to the end part but what do i copy and paste it as on a new pic great site by the way all the best..
Trev
I’m trying this but everytime I paste the image to a different picture, it’s way more tiny than the original, how do I enlarge it?
xx
spottyluv4@yahoo.com
This is the best TUT I’ve seen since I bought my PSPX2. Thank you!
I didn’t find the point to point selection
I love the tutorials, but why do you consider step 14 optional? Isn’t that the whole point of removing an object from it’s background. Why do you get so vague in the last few steps? It’s hard to learn that way.
it doesn’t look right on the last picture, but i learned much, thank you! But i still can’t make it to paste the picture on an other picture!
HI,
I followed your instructions, used the free hand tool, set to POINT TO POINT, REPLACE, however , when i started to lay down points, after a few while, the dots are connected , even i dont reached the start point yet…many times i’d tried, but the same time happened…it automatically connected therefore, {pls note that i dont click the right mouse button yet….}connecting the dots in wrong points…how can i correct this? It would be a helpful if you can tell me what’s wrong …or what should I do..thank you
Cool! I was able to do this and it turned out perfect. Thanks for posting the info.
This was very helpful thanks
Now how much do I love you lol I have been wanting to learn this forever and you have made it so easy..
So Thank You.
pen tool is better than the freehand tool cause you can edit if you make mistakes cutting out is always the hardest part but if the image is larger than 2000 pixels the background eraser should do a bulk of the work!
i dont have this program! damn it!
Why can’t I save the cutout as a picture with NO background? I want to laser the image without all the junk, and I have to save it in bitmap format… What am I missing?
the thing is with me wen i cut it the back ground is not the same as urs because wen i save it it saves the back ground i get a gray back ground how do i turn this off plz help thanks
Thanks for the tutoring, it’s help me a lot :).
Thank you! You made everything seem so easy.
My problem is that when I select the free hand tool it’s not showing nodes as I go along, only the line and I’m trying to cut out a large image that I need to zoom into quite a bit. I can’t move to different section of the image while I’m selecting my points. If I try out drags to selection like out away from the image I’m cutting.
Make sure you choose Point to Point mode when after selecting the freehand selection tool.
To you newbies that have problems with the point to point selecting an area before you’re finished surrounding the object, it’s probably because of not enough memory on your computer. PSP is a memory hog. And to “eeyore”, step 14 is optional because if you did everything right and were successful in saving the image as a transparent png image or a tube, you can always paste it into any background you want. The purpose of this tutorial wasn’t just for one picture, it was for any future uses you have for the pic. The finished pic could also be used in a web page and would seamlessly appear on any background.
[…] consisted of mostly text, simple graphics, and player cutouts. If you want to learn how to create photo cutouts then refer to this tutorial. The mirror effects are created simply by creating a duplicate layer of text and then flipping it […]
Thank you, thank you, thank you so much, for sooooo long i have been wanting to do this and now I CAN, wooohooooooo
AAARRGGGHHH!!! It’s not WORKING! I am sick of this! I have tried so many different tutorials, all different, this one seems more simple BUT IT DOESN’T WORK! I’m seriously being f**kin pissed off! Everytime I ‘paste as new image’ IT DOES NOT PASTE TO A TRANSPARENT BACKGROUND, PLEASE, someone help me!!!!!!! please!!!!!!!!!! omg
Sarah, make sure your selecting the correct layer in the layers palette before you select Edit > Copy.
I have been trying to do this for months and months with no success. I came across your site whilst looking for something else and guess what – it worked first time. You are a star – thank you so much. Off to look at your other tutorials.
[…] and set the mode to point to point. Place points around the object you want to cut out. See this previous tutorial for a more in-depth guide on how to use the point to point selection […]
thanks so much you saved my life!!
Great information! I’m still not getting everything, but it is pretty awesome and I really like it. Such a simple info but very attractive. The author and look refreshing. The blog design was emphasize better because of the huge graphics work. Thank you
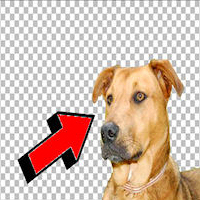
Remove Background
thank you for the tutorial. i was able to get through Step 12 where I have the cutout of the photo, pasted it as a new image, and saved it as a .png file. However, when I open the file in Photoshop, it still does not have a transparent background.
Please help.
Thanks!
newbie,
That is strange. Have you tried saving it as psd?