
In this tutorial you will learn how to easily add facial hair / beard / stubble / 6’oclock shadow (whatever you want to call it) to your photos. We will complete this tutorial using only five easy steps in Paint Shop Pro
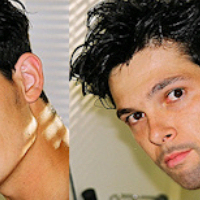
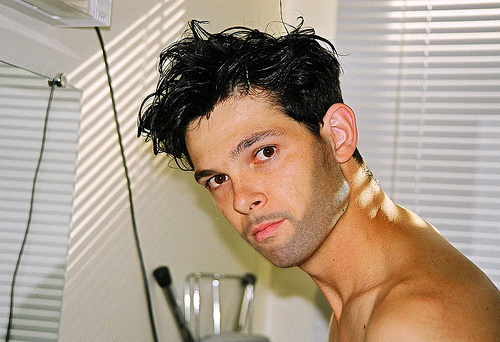
During this tutorial we will be using the Add Noise Filter, Curves tool, and the basic brush tools. I originally completed this tutorial using a photo of my wife. I gave her a nice six’oclock shadow and a backwards ball cap. Well she didn’t like the looks of it and refused to let me use it. 🙂 She doesn’t seem to mind being transformed into cats and other things, just no hairy men. I tried finding a photo of myself for this tutorial but I have yet to find one of me “post 16” without any facial hair. So for this tutorial I finally decided to go the stock photo route. For this demonstration I used this stock photo. from everystockphoto.com You are welcome to follow along using this photo or one of your photos.
Video Preview
You are also welcome to use my Youtube video for a reference while you work through this tutorial.
Step 1
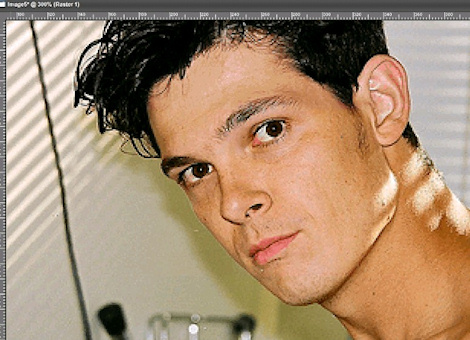
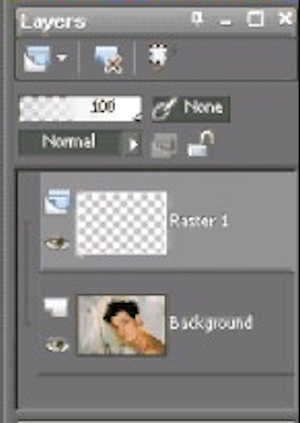
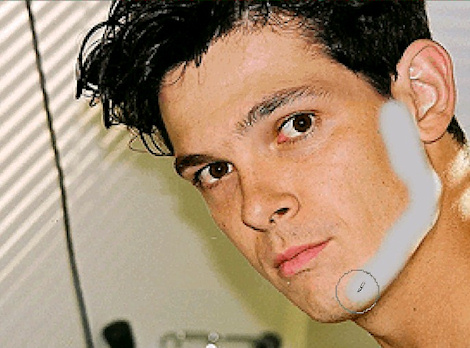
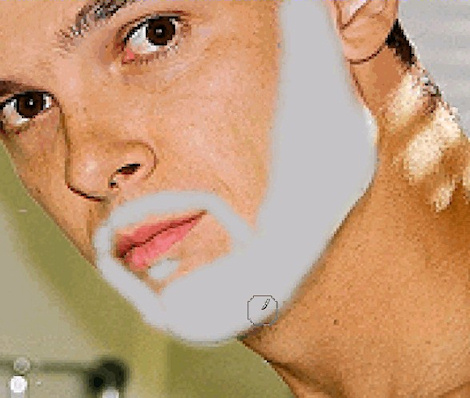
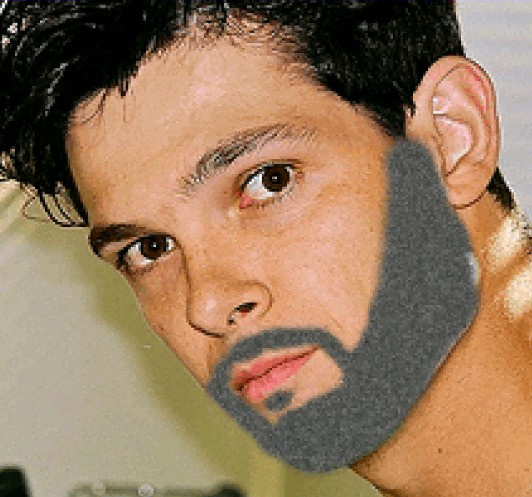
Open up the photo you want to add the beard/stubble/six o’clock shadow to. Right click the background layer and select New Raster Layer. Select the the newly created Raster 1 layer. Now begin by painting the beard with a round paint brush (Press “B” on your keyboard to access the paint brush tool), using a light gray color. I used #c0c0c0.
Hint: The painting/brushing of the beard does not have to be perfect. We will clean up any mishaps later using the eraser tool. See photos below for example.
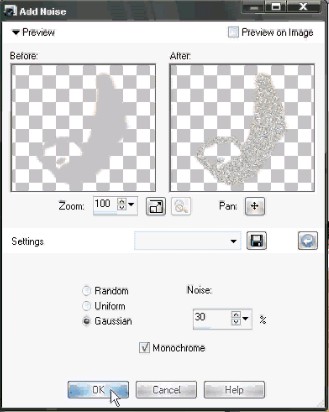
Step 2
Now that you have the light gray beard painted on, go to Adjust > Add/Remove Noise > Add Noise and use similar settings that you see in the image below.
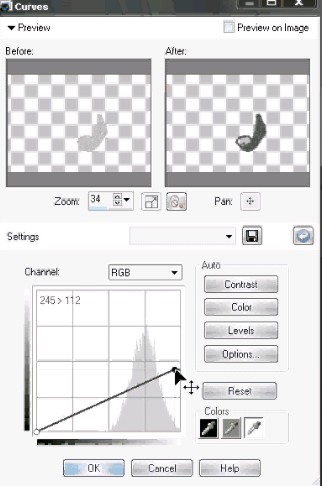
Step 3
Next, go to Adjust > Brightness and Contrast > Curves and darken the tone by dragging the control handle down. The further down you drag the handle, the darker the tone. See images below for example.
Step 4
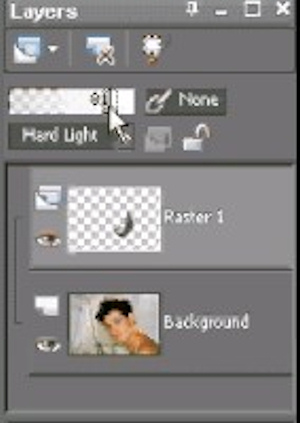
Next, set the Blend Mode of Raster 1 to Hard Light. Now lower the Opacity of Raster 1 to about 80 percent or whatever you desire.
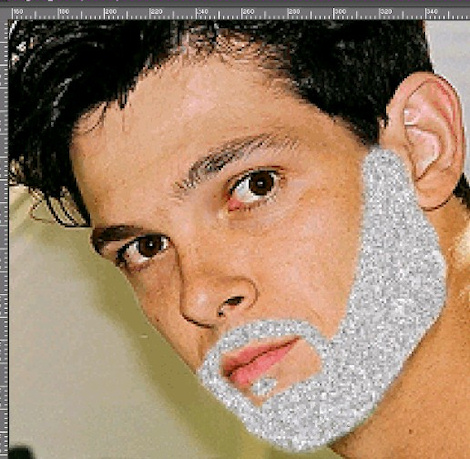
Optional: If you are using a image that is not very sharp or clear, and/or your beard turns out too detailed for for the photo you are using, then you can you should go back and add some Radial Blur after step 3. Adjust > Blur > Radial Blur. If you have a nice clear/sharp photo then overlook this optional step. My image was clear so I did not need to add any additional
Step 5
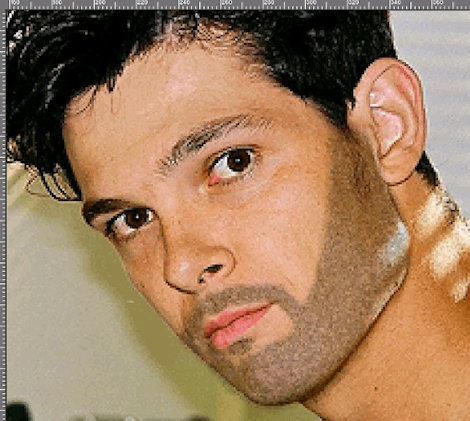
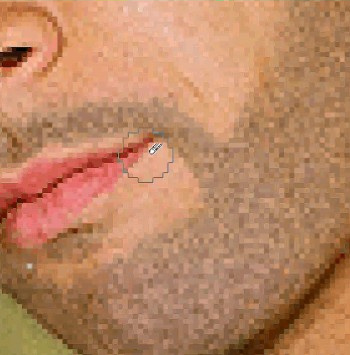
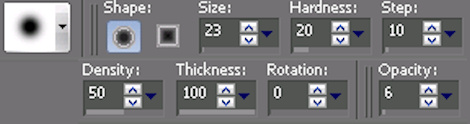
Finally, grab the eraser tool (press X on your Keyboard to access) and use the settings similar to the following photo to slowly brush away any mishaps and to trim the beard to your liking. Hint: The lower opacity, density, and hardness settings of the eraser brush will allow you to gradually erase edges allowing you to achieve natural blending with the skin.
Final Results
If you followed the tutorial correctly you should have achieved similar results. Thanks for visiting and I hope you enjoyed this tutorial. Comments and feedback are welcome.
8 Responses
this is so cooool.. im a beginner in using corel and im glad for ur help!
wow! it works! =]
great tutorial, you’re really good at this. keep up the good work and thanks!!!
I found your blog on google and read a few of your other posts. I just added you to my Google News Reader. Keep up the good work. Look forward to reading more from you in the future.
hi, i’m iman..i’m the beginner..thanks for this tutorial..really love it…but how can i remove beard and background?hope you can help me..
Thanks for posting this, I’m using Paint.net, and I’m prett close to as perfect as your’s but not quite there yet.. Paint.net has about the same tools, but their in different places, and some are named different names, so I’m gonna keep at it, but thank’s again for the basic how to guide 😉
Fantastic tutorial, I used PS CS4 and it worked like a charm. Thanks for sharing this valuable knowledge! 🙂
Thanks Brotha!