
This is a fun little tutorial that will teach you how to change/swap faces on photos of people using Paint Shop Pro. I have a lot of fun with switching faces around on photos of my Facebook friends. It is especially hilarious when you switch out couples faces.
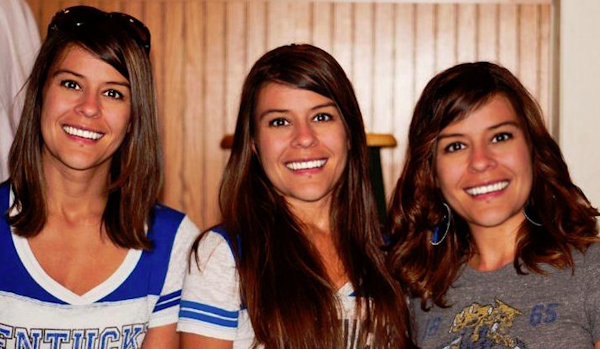
In this tutorial we will mainly be using the freehand selection tool, eraser tool, and deform tool. For this demonstration, I used a photo of my beautiful wife and her beautiful sisters. The reason I chose this photo is because I want to demonstrate to the girls how much they really look alike. See the final results at the conclusion of this tutorial.
BTW, it is hard to believe these women are all in their mid to late 30’s at the time this photo was taken. You all look incredible.
Let’s get started!
Follow along with How to switch faces video tutorial
Step 1
Open the photo that you want to swap faces on.

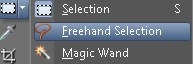
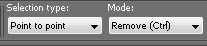
Step 2
Select the Freehand Selection tool and set the mode to Point to Point.
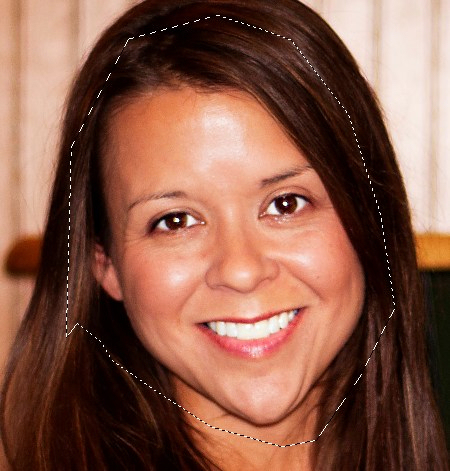
Step 3
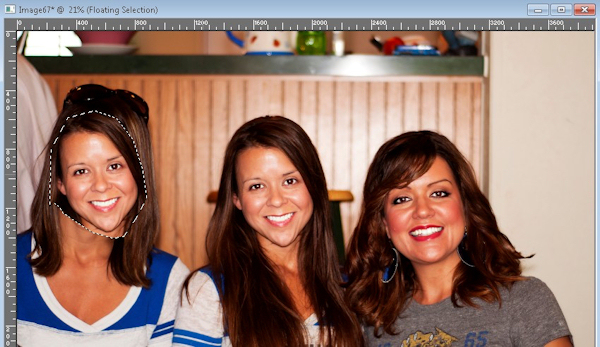
Make a selection around the face and copy it (Edit > Copy). The selection doesn’t have to be perfect because will be using the eraser tool to blend it over-top the other face.
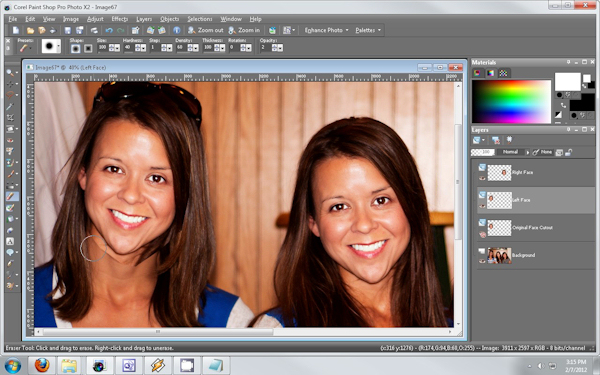
Step 4
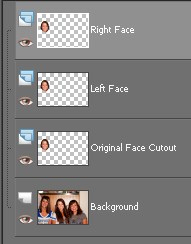
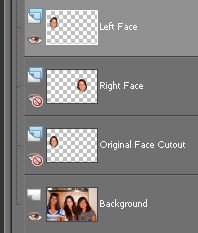
Next, select Edit > Paste as New Layer. Press CTRL + D to deselect, now rename the layer to Original Face Cutout. Duplicate it twice (only once if you are swapping one face) and then rename the duplicates to Right Face and Left Face. Toggle the visibility off of the face cutouts you are not using.
Step 5
Use the move tool to roughly position the visible cutout face layer (left face for this example) over the face you will be swapping (Press M on keyboard to activate Move tool ).
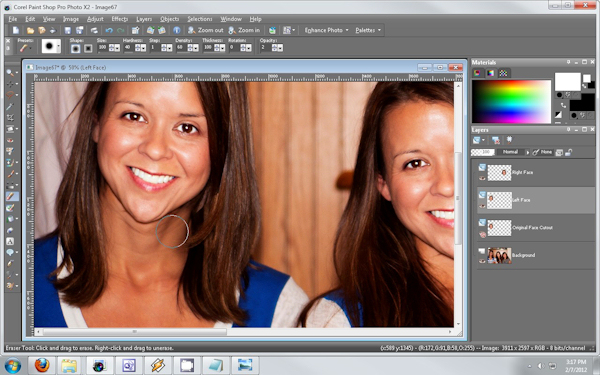
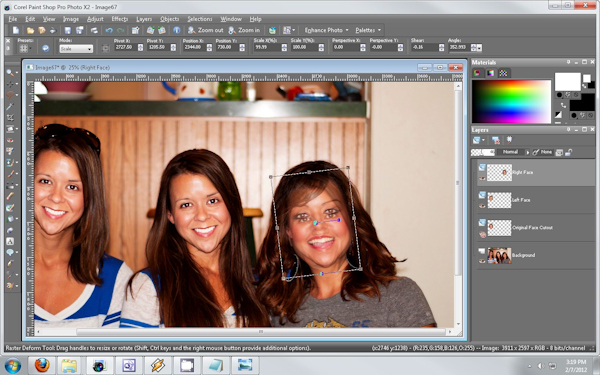
Step 6
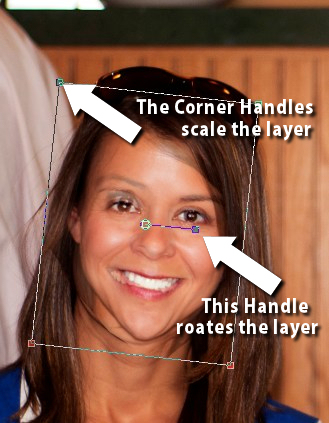
Next, Press D to activate the deform tool. Set deform mode to SCALE, and use the drag handles to align and size the face. NOTE: Lower the opacity some to help you align the face orientation properly. Aligning the eyes usually will get you the correct orientation.

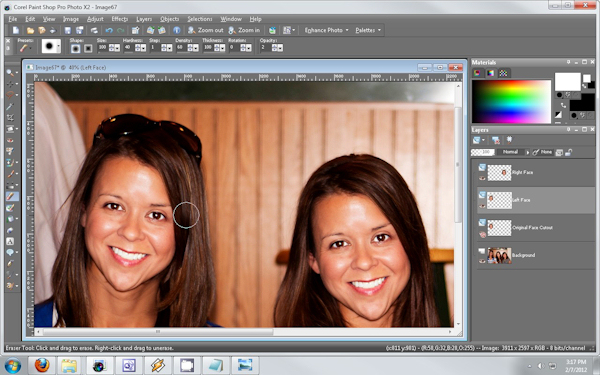
Step 7
Turn the opacity back up to 100% once you have the face layer aligned where you want it. Next, select the eraser tool and set eraser settings similar to what you see in the photo below. You may have to use a different eraser brush size depending on the size of your photo.

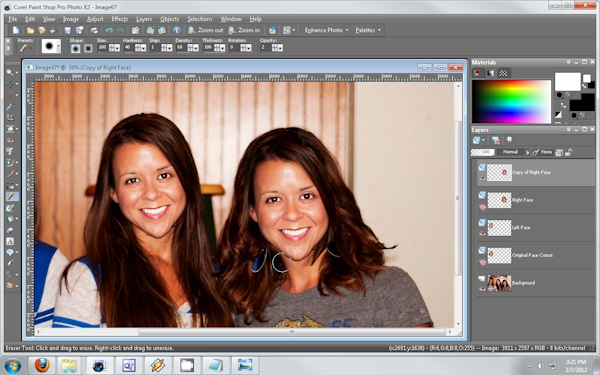
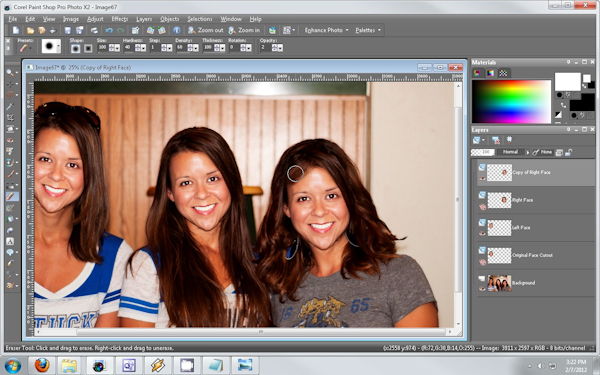
Step 8
Use the eraser tool and slowly remove and/or blend the unwanted areas of the visible face cutout layer. If you make a mistake and remove too much, just click Edit > Undo to undo the mistake.

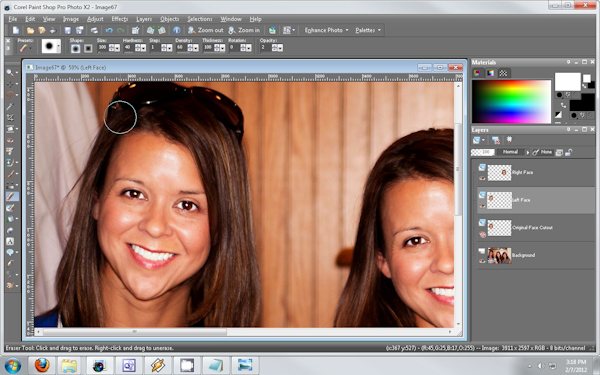
Step 9
Just repeat the process if you are swapping two or more faces.


Step 10
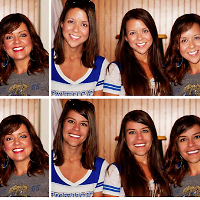
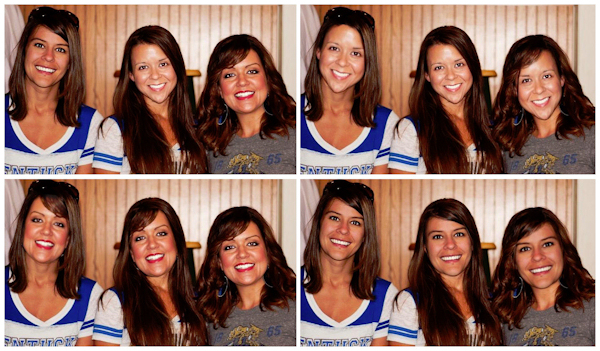
I went ahead and swapped out all their faces.
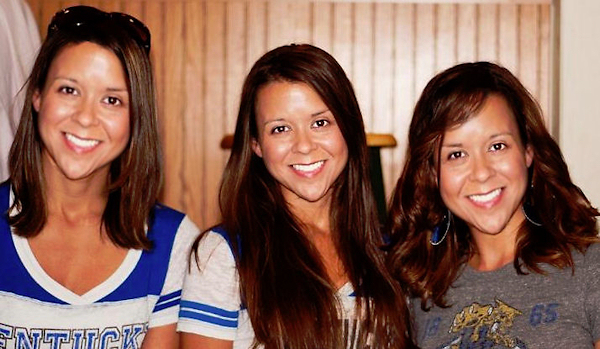

Final Results!
The Triplets!
2 Responses
This is very funny!! Omg I need to try this–thank you so much for this tutorial!
your blog really attractive, it gives me an inspiration for me to apply into my blog … thanks:)